
Improve the personnalization of your campaigns by exposing Adobe Campaign API endpoints using JavaScript Server Pages “JSSP” to enrich any data such as Recipients or Campaigns!
The Adobe Campaign xtk:jssp module provides everything you need to build a web server without external dependencies. It handles incoming requests, parses HTTP headers, manages connections, and sends responses - all through built-in JavaScript libraries.
Walkthrough
An Adobe Campaign JSSP page is very similar to a NodeJS web server and can be used to extend its marketing capabilities. The most common use case is to create a JSON API endpoint to Read or Write data ; and we will also cover extra use cases such as working with custom authentication and permissions.
Serve a static text
Create a new record in any JSSP folder, such as the default /Administration/Configuration/Dynamic JavaScript pages. Its name will define the URL: myros:hello.jssp creates the endpoint https://instance.com/myros/hello.jssp. Hit save and open its URL in any browser:
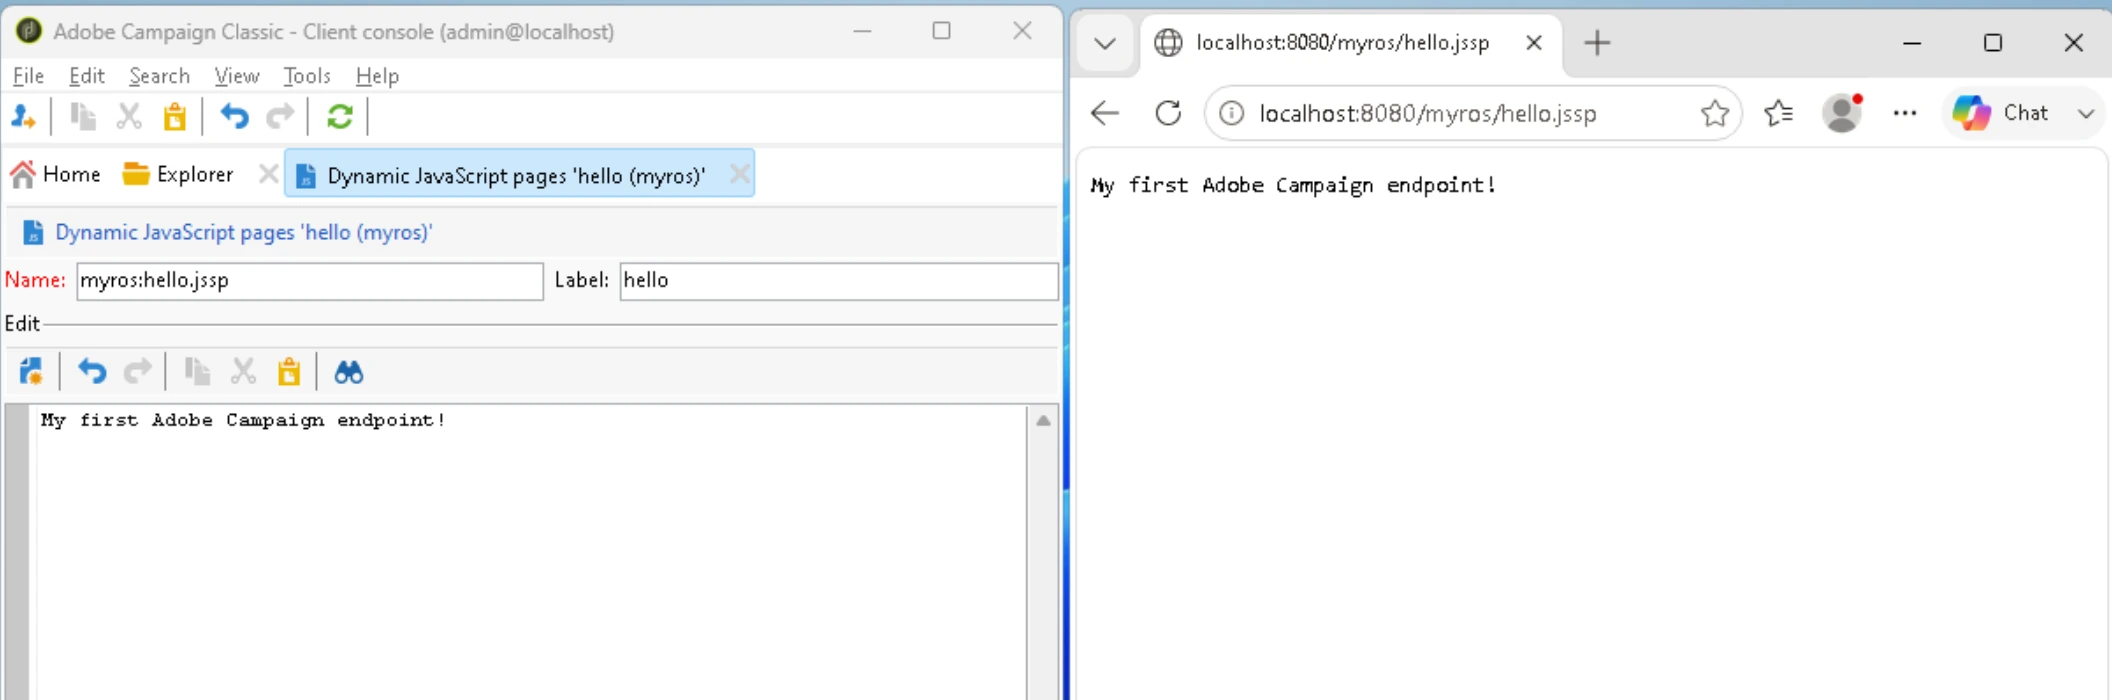
No need to publish, no cache, the page is instantly available! Note: the
.jsspname suffix is mandatory
Output a dynamic JSON
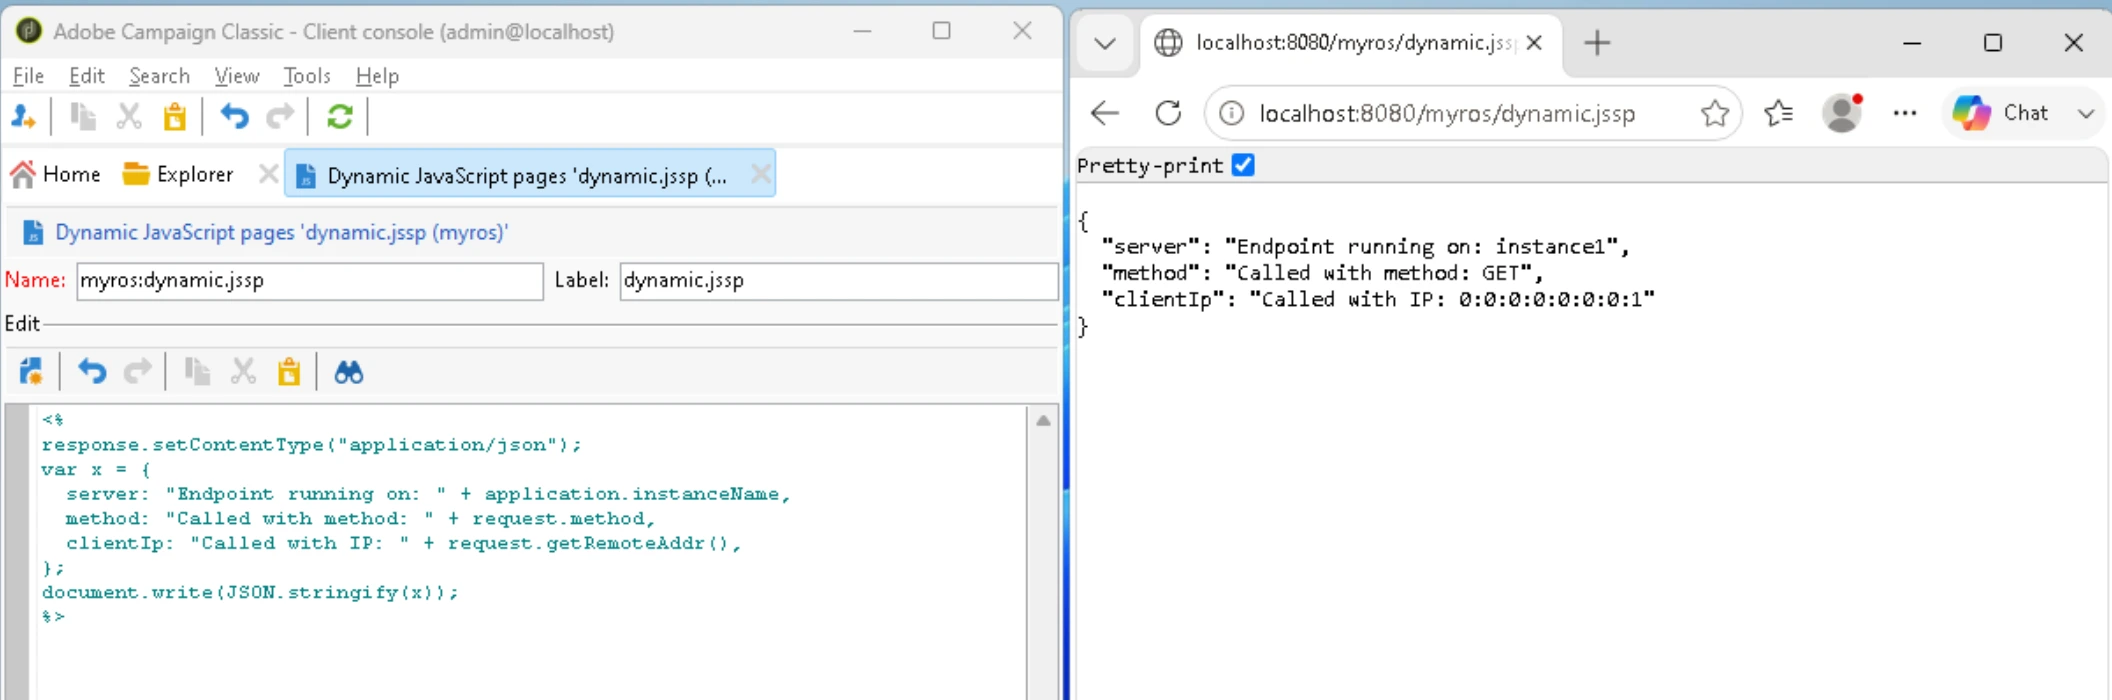
Let’s extend this basic webpage by adding dynamic values from the built-in JavaScript framework of Adobe Campaign. Using application, 📕 request/📕 response and 📕 write, in the JSSP delimiters <% ... %>:
<%
response.setContentType("application/json");
var x = {
  server: "Endpoint running on: " + application.instanceName,
  method: "Called with method: " + request.method,
  clientIp: "Called with IP: " + request.getRemoteAddr(),
};
document.write(JSON.stringify(x));
%>
Best practices
This article focuses on creating Adobe Campaign API endpoints with the following best practices:
- Usage: a JSSP is commonly used to create custom endpoints, and not to serve HTML webpages. To choose between Webapp, SOAP and JSSP, see the 📕 JSSP reference for details
-
Format: modern endpoints are using JSON so is this article but any text content type works (
application/xml,text/csv,text/csv…) -
Software Architecture: the built-in Adobe Campaign IDE has limited JSSP support but does better with JavaScript files. We recommend importing a
xtk:javascriptin the JSSP via<% loadLibrary("myros:myFile"); %>instead of embedding huge codes in the JSSP. See the Modern AC Best Practices for more. - Testing: integration tests in this article will be done via the HTTP Client Bruno
- Security: JSSP endpoints can expose any Adobe Campaign data, see the Going further section for increased security
GET JSON API example
Let’s get back to our example and build a GET endpoint that retrieves the last 10 created recipients from the database using 📕 queryDef and 📕 logonEscalation!
Create the JavaScript myros:get-api loaded in myros:get-api.jssp via <% loadLibrary("myros:get-api"); main(request, response); %>:
function main(request, response) {
  logonEscalation("webapp"); // get access to the database with the standard webapp access
  response.setContentType("application/json"); // set the response content type to JSON
  var query = NLWS.xtkQueryDef.create({
    queryDef: {
      schema: "nms:recipient",
      operation: "select",
      lineCount: 10,
      select: { node: [{ expr: "@cryptedId" }, { expr: "@domain" }] },
      orderBy: { node: [{ expr: "@created", sortDesc: true }] },
    },
  }); // get the first 10 recipients from the database
  var records = query.ExecuteQuery(); // DOMElement
  const output = []; // plain JSON object
  // convert the DOMElement to a plain JSON object
  records.getElements().forEach(function (record) {
    output.push({
      id: record.$cryptedId,
      label: record.$domain,
    });
  });
  document.write(JSON.stringify(output)); // output the JSON to the response
}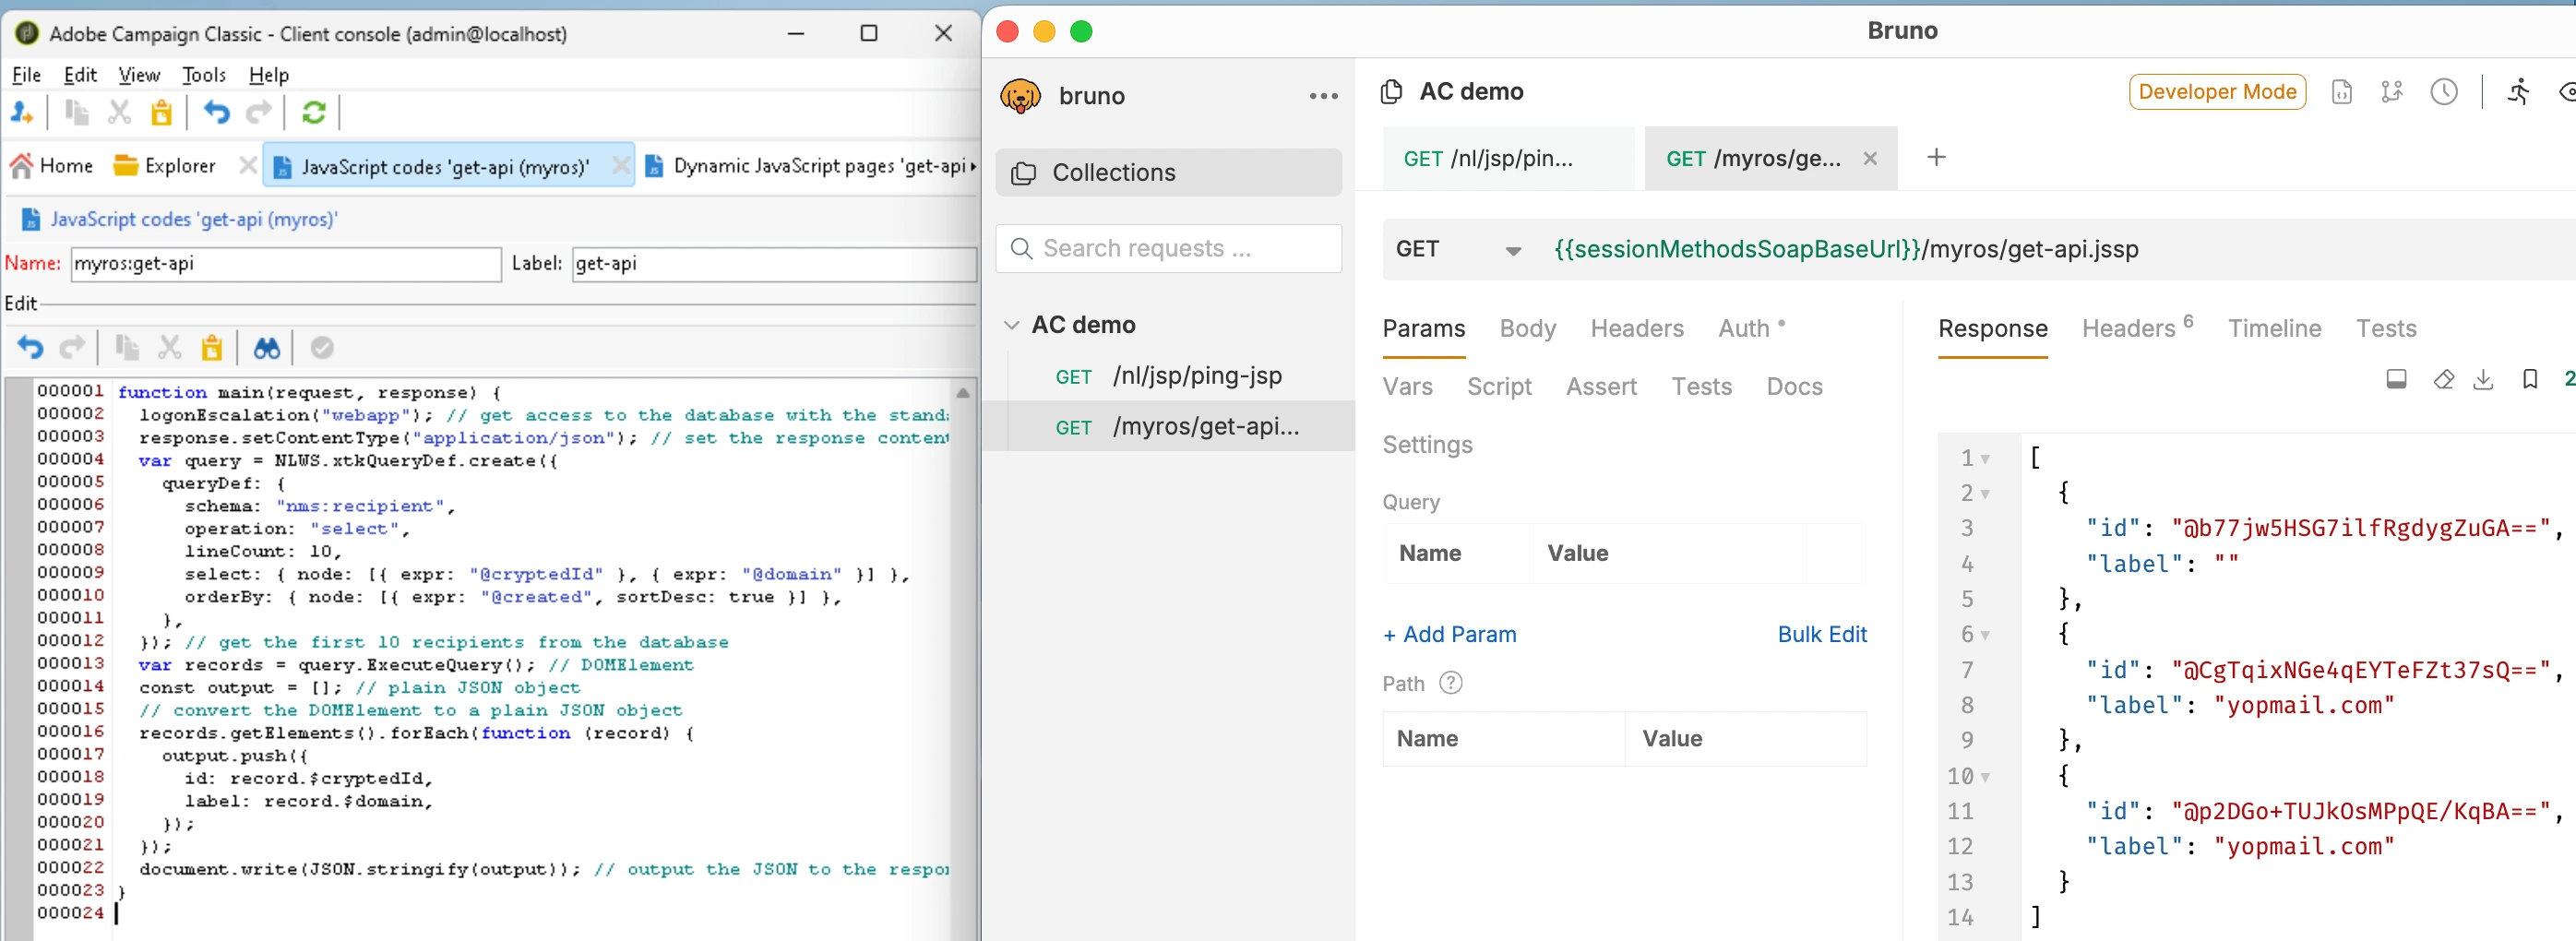
That’s it! You built a working API endpoint fetching the recipients and returning them as a JSON array.
Want to customize the search with a GET parameter, such as the email? Get the parameter with 📕 request.getParameter and sanitize it with 📕 NL.SQL.escape:
// [...]
const email = request.getParameter("email"); // fetch "email" GET param from URL
loadLibrary("/nl/core/shared/nl.js"); // import NL namespace
NL.require("/nl/core/sql.js"); // import NL.SQL namespace
const emailSanitized = NL.SQL.escape(email); // sanitize the email to prevent SQL injection
if (NL.isEmpty(email)) {
  return response.sendError(400);
}
var query = NLWS.xtkQueryDef.create({
  // [...]
  where: {
    condition: [
      { expr: 'Lower(@email) LIKE "%' + emailSanitized + '%"' }, // filter by email
    ],
  },
});
POST JSON API example
Beyond reading data, Adobe Campaign JSSP can also be used to write data, such as a XXX POST endpoint.
Read the body with 📕 request (getBodyAsString), escalate, then load the record — inside a <% %> block:
response.setContentType("application/json");
if (request["method"] != "POST") {
  document.write(
    JSON.stringify({ status: "KO", error: "Please use HTTP POST" })
  );
  logError("Please use HTTP POST");
}
var body = request.getBodyAsString();
var bodyAsJson = JSON.parse(body);
if (!bodyAsJson.recipientId) {
  document.write(
    JSON.stringify({ status: "KO", error: 'Missing "recipientId" key' })
  );
  logError('Missing "recipientId" key');
}
logonEscalation("webapp");
var recipient = NLWS.nmsRecipient.load(bodyAsJson.recipientId);
var result = {
  status: "OK",
  length: 1,
  results: [
    {
      firstName: recipient.firstName,
      createdDate: recipient.created,
    },
  ],
};
document.write(JSON.stringify(result));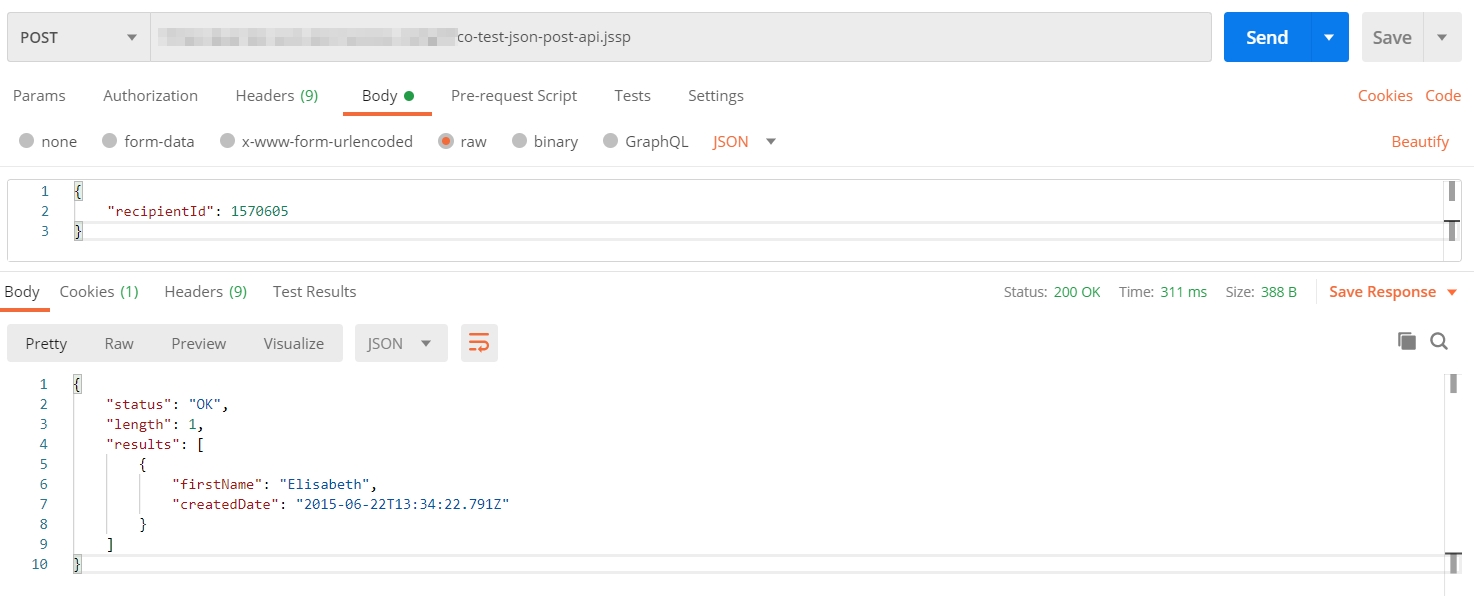
Troubleshooting
XTK-170019 Access denied
Database requests can error with the message XTK-170019 Access denied.. This is because the default JSSP operator (📕 application.operator) is anonymous:
document.write(application.operator.computeString); // Anonymous account
So we escalate the session with 📕 logonEscalation:
const before = application.operator;
var oldContext = logonEscalation("webapp"); // login with the standard webapp access
const after = application.operator;
for (var i in after) {
  logInfo(i + ": " + before[i] + " => " + after[i] + "\n"); // debug the values in the logs
}
logonWithContext(oldContext); // log back in as previous user
Open the Web logs to get:
login: webapp
computeString: Web applications agent (webapp) [...]
The webapp operator is a privileged user, consider creating an operator with less permissions.
Content type
Note: Some clients may give an error as the Header Content-Type is not defined. I.e. in Restlet Client:
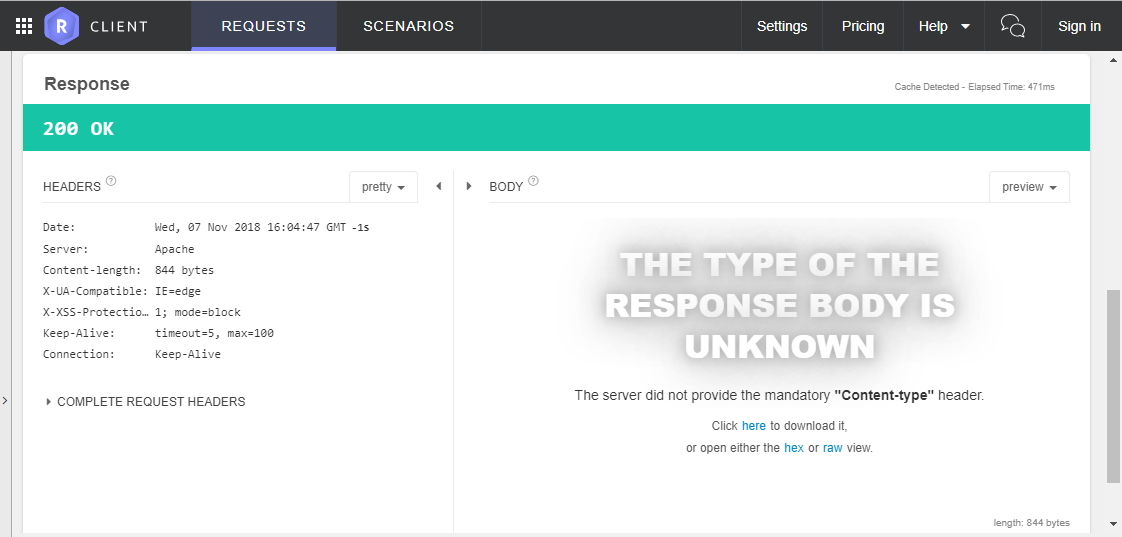
To fix it, set the content type with 📕 setContentType — add response.setContentType('text/html;charset=utf-8'); before any output:
<% response.setContentType("text/html;charset=utf-8"); %>
<!DOCTYPE html>
<html lang="en" dir="ltr">
  <head>
    <meta charset="utf-8" />
    <title>Title here</title>
  </head>
  <body>
    Body Here
  </body>
</html>
Sources
- https://www.digitalocean.com/community/tutorials/how-to-create-a-web-server-in-node-js-with-the-http-module
Going further
HttpServletRequest API
The request object is an HttpServletRequest. See 📕 request for the full list of methods (getParameter, getBodyAsString, getHeader, getRemoteAddr, forward…) and properties (method, queryString, cookies…).
HttpServletResponse API
The response object is an HttpServletResponse. See 📕 response for the full method list — setContentType, sendRedirect, addCookie, addHeader, sendError.
Encode and decode URL
/** Convert string to URL safe equivalent */
encodeURI(string);
encodeURI("Hello world?!'=-"); // "Hello%20world?!'=-"
// encodeURI can be used on a full URL, without messing with : / ? or &
encodeURI("https://example.com?var1=val1&var2=val2"); // "https://example.com?var1=val1&var2=val2"

/** Convert string from URL safe */
decodeURI(string);
decodeURI("Hello%20world?!'=-"); // "Hello world?!'=-"