Adobe Campaign documentation is great to build 2-3 web apps. But it’s absolutely not scalable in case you need to develop 25-30 web apps with a lot of assets (CSS, JS, Images).
Implement Bootstrap templates, centralized asset management via RESOURCE_URL, and social sharing meta tags to build scalable, maintainable web applications in Adobe Campaign 7.
Preparation
Use a modern HTML5 template with Bootstrap 3 to standardize your web application structure across Adobe Campaign.
Bootstrap boilerplate
For every web app, use the following boilerplate code:
<!DOCTYPE html>
<html lang="en">
  <head>
    <meta charset="utf-8" />
    <meta http-equiv="X-UA-Compatible" content="IE=edge" />
    <meta name="viewport" content="width=device-width, initial-scale=1" />
    <!-- Title -->
    <title>Subscription</title>
    <!-- favicon -->
    <link href="<%= getOption('RESOURCES_URL') %>favicon.ico" rel="icon" />
    <!-- see next chapter for 'RESOURCES_URL' -->
    <link href="<%= getOption('RESOURCES_URL') %>favicon.ico" rel="shortcut icon" />
    <link
      href="<%= getOption('RESOURCES_URL') %>favicon.png"
      rel="shortcut icon"
      type="image/png"
    />
    <!-- Common CSS -->
    <link
      rel="stylesheet"
      href="https://cdn.jsdelivr.net/npm/[email protected]/dist/css/bootstrap.min.css"
    />
    <link rel="stylesheet" href="<%= getOption('RESOURCES_URL') %>base.css" />
    <!-- see next chapter for 'RESOURCES_URL' -->
    <!-- Custom CSS -->
    <link rel="stylesheet" href="<%= getOption('RESOURCES_URL') %>my-layout.css" />
    <style type="text/css" media="all">
      /* always keep an inline <style> for quick edit by designers */
    </style>
  </head>

  <body class="container">
    <!-- or .container-fluid, see https://getbootstrap.com/docs/3.3/css/#overview-container -->
    <!-- Common JS -->
    <script
      src="https://cdn.jsdelivr.net/npm/[email protected]/dist/js/bootstrap.min.js"
      type="text/javascript"
    ></script>
    <link rel="stylesheet" href="<%= getOption('RESOURCES_URL') %>base.js" />
    <link rel="stylesheet" href="<%= getOption('RESOURCES_URL') %>google-analytics.js" />
    <!-- Custom JS -->
    <link rel="stylesheet" href="<%= getOption('RESOURCES_URL') %>my-page.js" />
  </body>
</html>
In short you have the following:
- Use modern HTML template from https://getbootstrap.com/docs/3.3/getting-started/#template
- Always separate you common assets (common to all web apps), from the custom assets (on a per case basis)
- Don’t include jQuery as it will be automatically added by Adobe Campaign itself. Adobe Campaign 7 will by default import:
-
jQuery 1.9.1. Note: jQuery is available viajQueryand not with$. jQuery-migrate 1.1.1spin.js 2.3.2JSON2 polyfill
-
- A Google analytics easy set up, to capture traffic
- Use a global option for the Adobe Campaign Resources CDN, see below
Walkthrough
Centralize assets with RESOURCE_URL
Adobe Campaign provides the Online Resources URL via JavaScript with xtk.fileRes.GetPublicFileResURL(). Call it in a workflow or get it from a Resource:
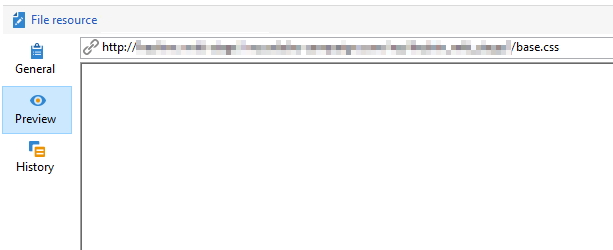
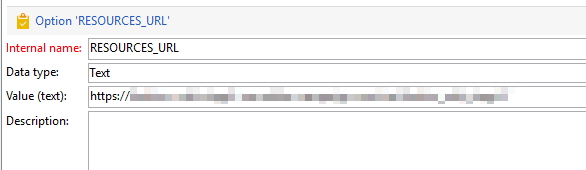
Replace http by https and store it in an Option:
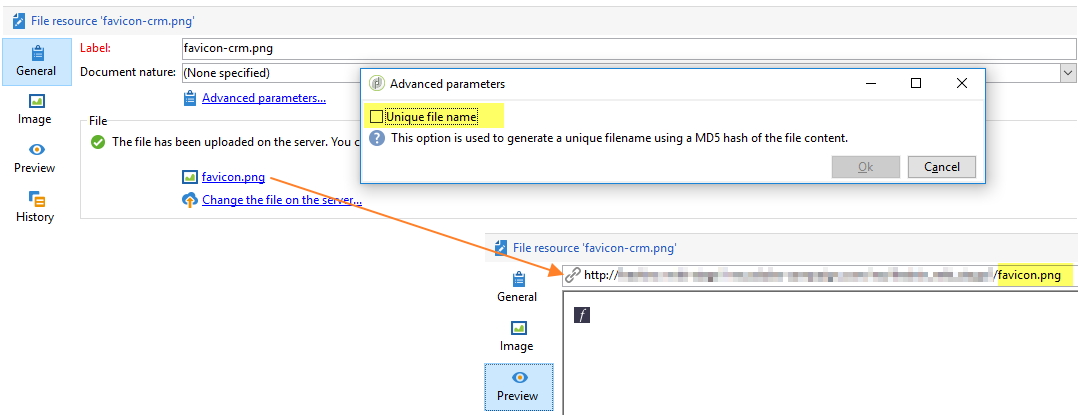
Use filename instead of md5 hash
By default, every File Resource receives a Public URL based on its md5 content hash.
This is not scalable. If you change an image, the md5 changes, requiring you to update the Public URL in all your web apps. Every CSS change would require editing Public URLs across all applications.
Instead, configure Adobe Campaign to use the filename in place of the md5 hash. Uncheck the checkbox in the resource’s advanced parameters:
Consume assets consistently
With RESOURCE_URL and filename-based URLs, you can now reference assets cleanly:
<!-- CSS -->
<link rel="stylesheet" href="<%= getOption('RESOURCES_URL') %>style.css" />
<!-- JS -->
<script src="<%= getOption('RESOURCES_URL') %>script.js" type="text/javascript"></script>
<!-- Image -->
<img src="<%= getOption('RESOURCES_URL') %>loader.svg" />
This approach lets you migrate effortlessly between Staging, Dev, and Production environments. We’re now #DRY compliant.
Going further
Add social sharing meta data
Ever tried to share a web app on Facebook?
Update your workflow by adding a JavaScript activity right before the first page:
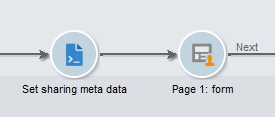
Use this JS code:
ctx.sharing.title = "Title for Social Media";
ctx.sharing.author = "Author";
ctx.sharing.description = "Social description";
ctx.sharing.image = "https://Public image URL used for sharing";
Add these meta tags to your HTML head:
<!-- meta For Google -->
<meta name="description" content="<%= ctx.sharing.description %>" />
<meta name="author" content="<%= ctx.sharing.author %>" />
<!-- meta For Facebook -->
<meta property="og:title" content="<%= ctx.sharing.title %>" />
<meta property="og:type" content="article" />
<meta property="og:image" content="<%= ctx.sharing.image %>" />
<meta property="og:description" content="<%= ctx.sharing.description %>" />
<!-- meta For Twitter -->
<meta name="twitter:card" content="summary" />
<meta name="twitter:title" content="<%= ctx.sharing.title %>" />
<meta name="twitter:description" content="<%= ctx.sharing.description %>" />
<meta name="twitter:image" content="<%= ctx.sharing.image %>" />
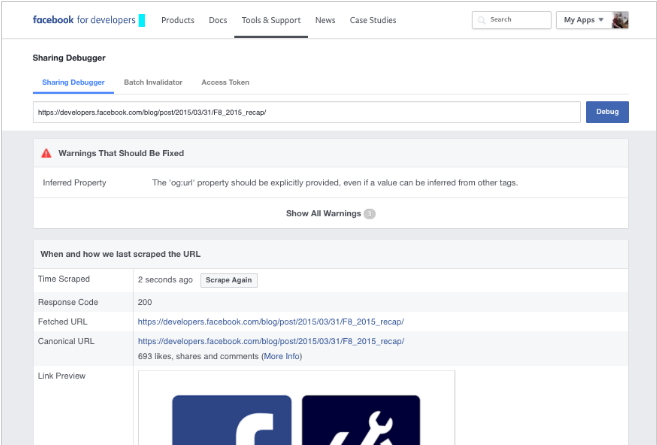
You can test your markup for Facebook on Facebook Sharing Debugger: