
Need to test workflows or develop custom JavaScript for Adobe Campaign without affecting production? Run it locally.
This guide shows how to install Adobe Campaign v7/v8 on Windows 11 with both the Console and the Server, along with instructions for dependencies: Java JDK & PostgreSQL, for a complete local development environment.
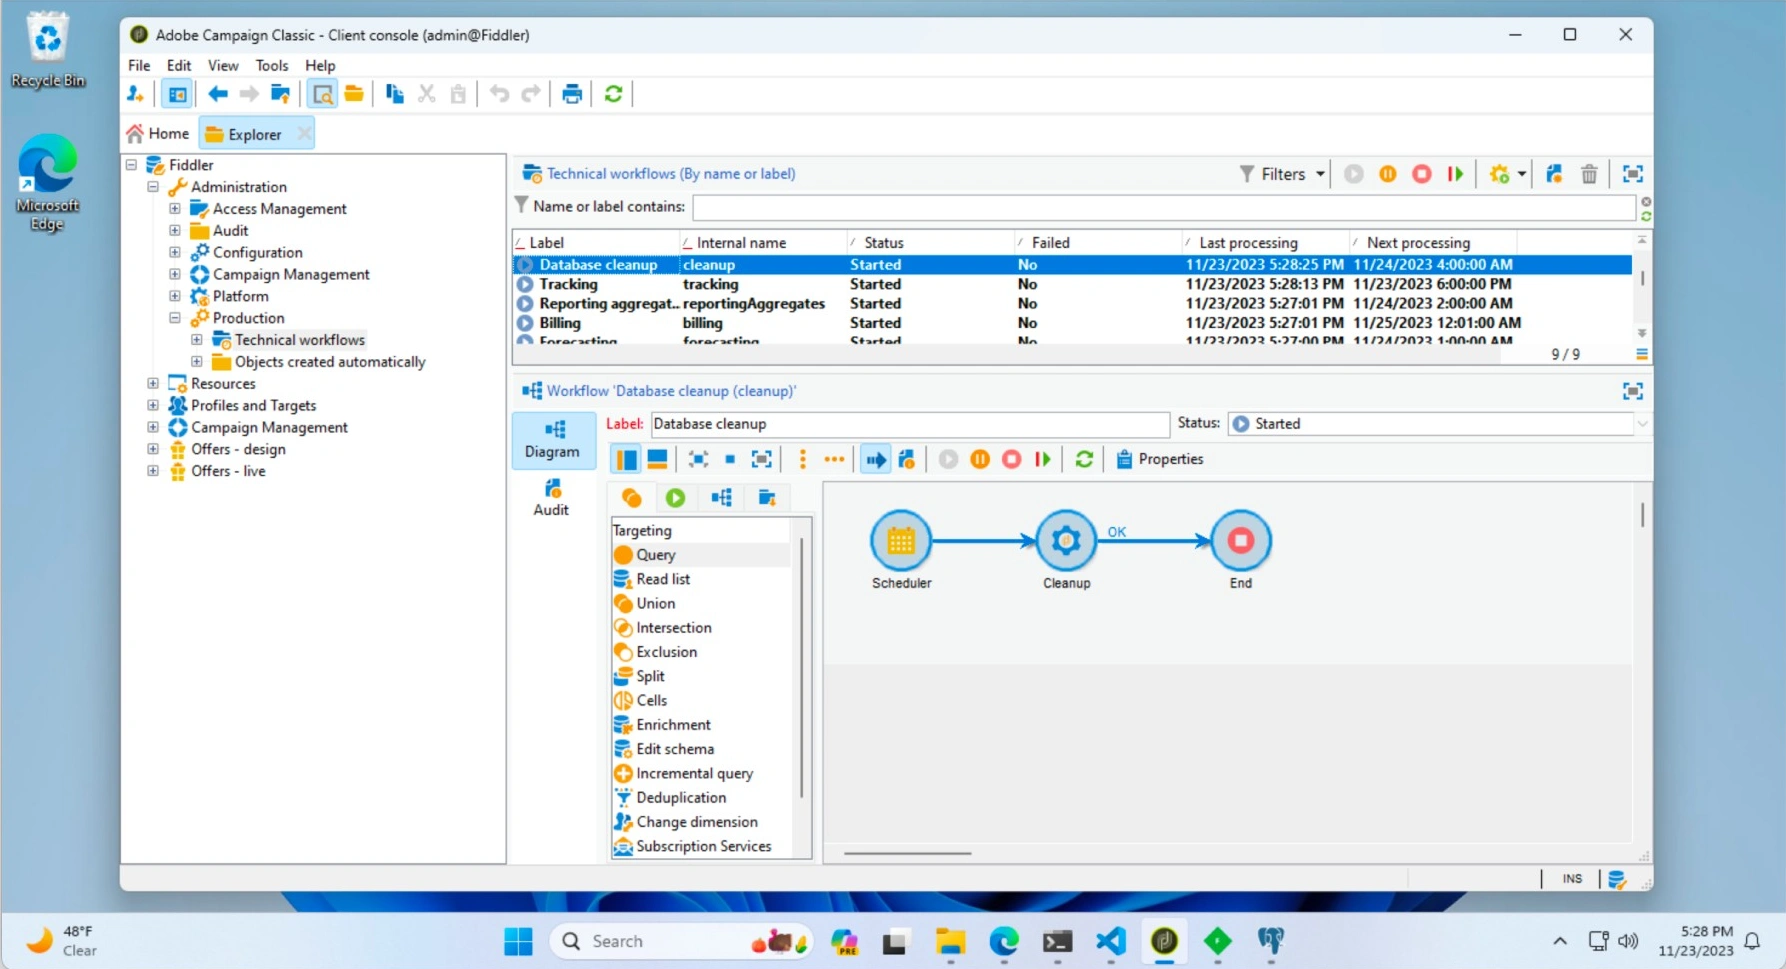
Preparation
- Windows with Administrator rights (for Adobe Campaign server and its dependencies: Java JDK, PostgreSQL)
-
Java JDK 11 installed
- i.e. oracle.com: jdk-11.0.21_windows-x64_bin.exe (141 MB)
- To validate, run in a Terminal
javac -version
-
PostgreSQL 14 installed
- i.e. enterprisedb.com: postgresql-14.10-1-windows-x64.exe (347 MB)
- To validate, run in a Terminal
pg_config --version
-
Adobe Campaign server setup v7/v8 downloaded
- From adobe.com: 7.X.X - build YYYY - Windows - GENERAL AVAILABILITY, get your
7.X.YYYY.zip(91 MB)
- From adobe.com: 7.X.X - build YYYY - Windows - GENERAL AVAILABILITY, get your
Need a refresher on the Adobe Campaign architecture? Read the 📕 Architecture Reference
Walkthrough
The steps must be ran in order: install the server, run the server, setup an instance, login to the instance.
Install the Server
- Unzip
7.X.YYYY.zipto7.X.YYYY, then launch7.X.YYYY\setup.exeand complete the setup - Add the below folder to the user
PATHvia “Edit environment variables for your account”C:\Program Files\Adobe\Adobe Campaign Classic v7\bin
The server is now installed! Test the installation by running nlserver in a new Terminal:
nlserver
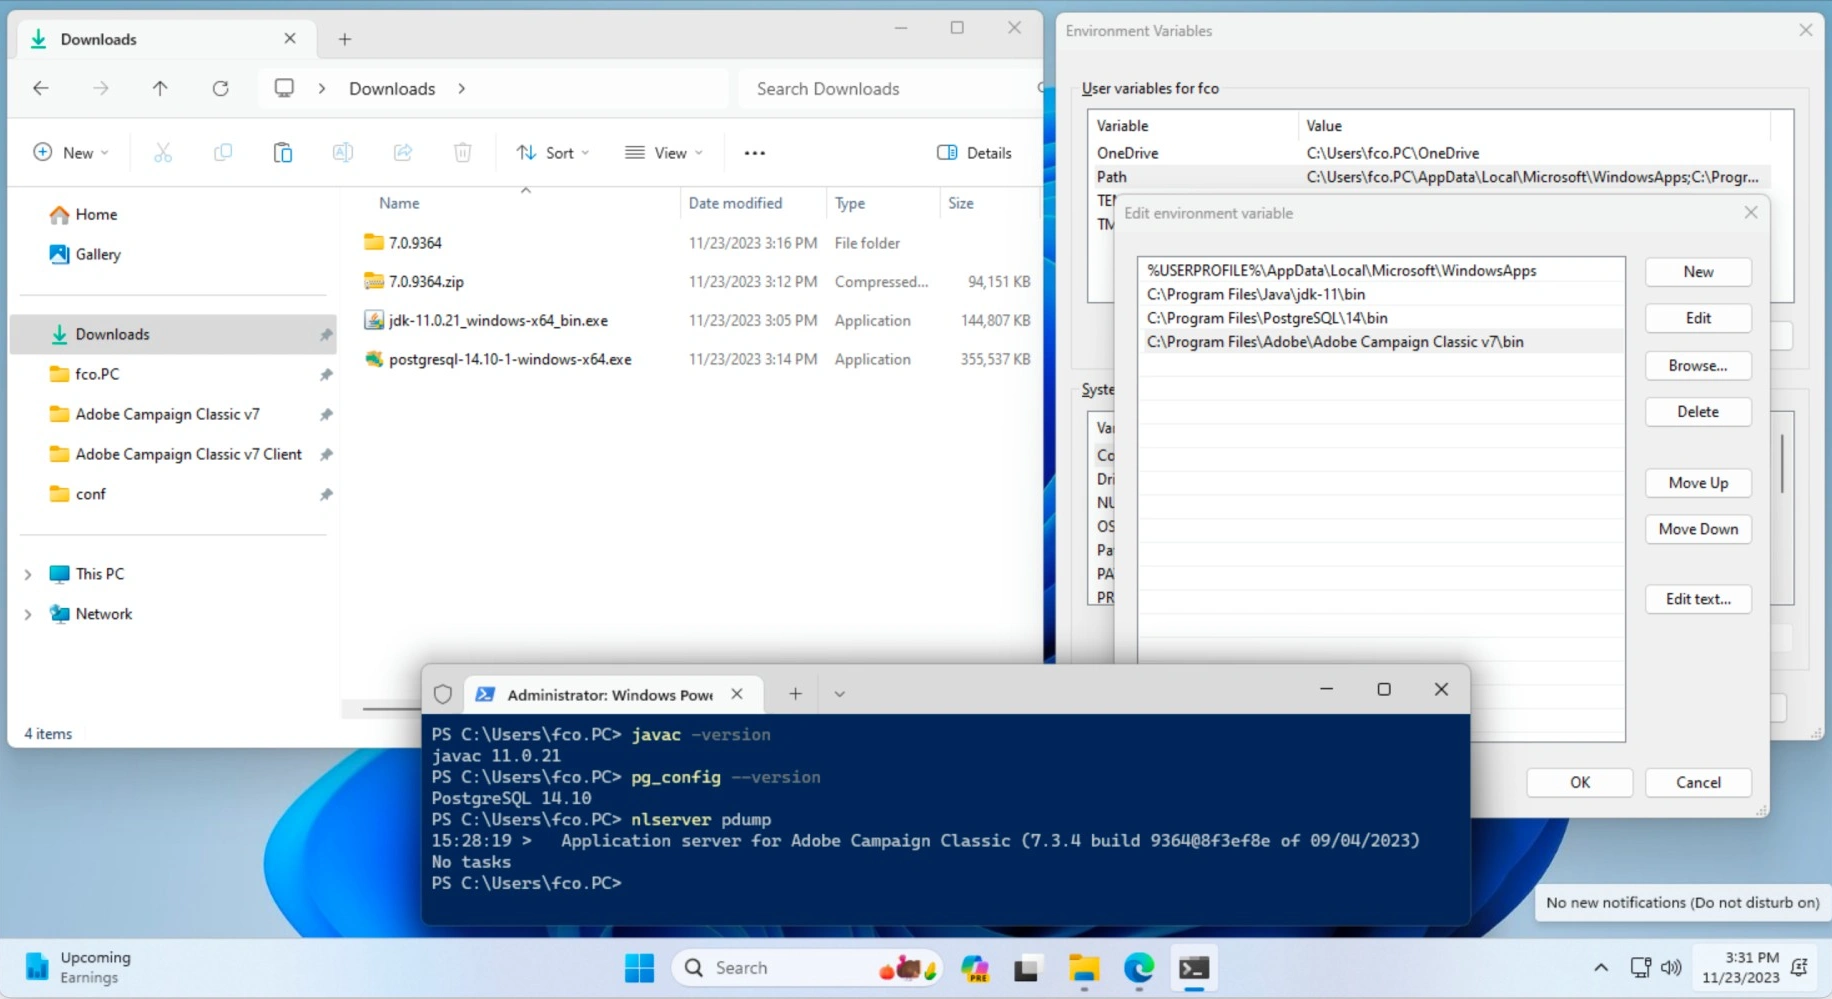
Sample output:
# Usage: nlserver <command> <arguments of command>.
#
#   Available commands are:
#
#     aliasCleansing cleanse enumeration values
#     archiving      [...]
Now that the server is installed, head to the next section to run it.
Run the Server
To run the server, open an Administrator Terminal and follow the 3 commands.
First, initialize the default configuration files serverConf.xml & config-default.xml with:
nlserver web
Then, start the Tomcat server:
nlserver start web
Finally, change the default internal password. Note: when prompted for the current password, hit Enter as it’s empty.
nlserver config -internalpassword
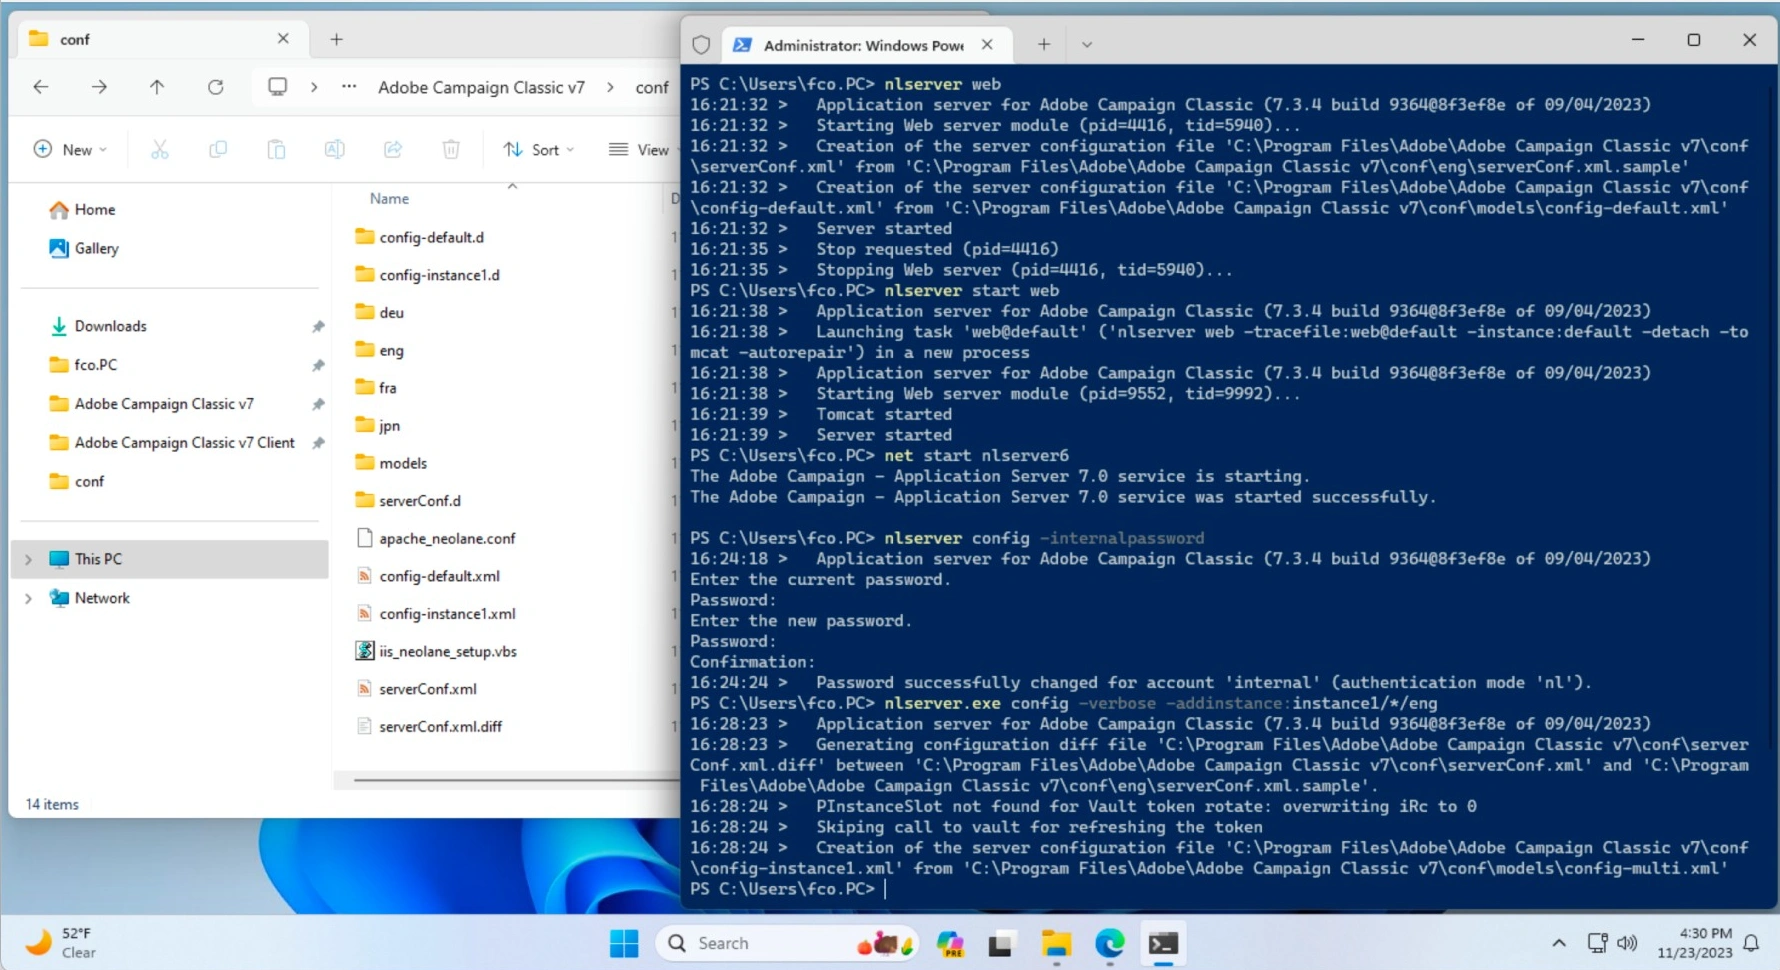
Sample output for nlserver web:
# 16:19:10 >   Application server for Adobe Campaign Classic (7.X.X build YYYY@aaa1111 of 01/01/2026)
# 16:19:10 >   Starting Web server module (pid=7636, tid=3156)...
# 16:19:10 >   Creation of the server configuration file 'C:\Program Files\Adobe\Adobe Campaign Classic v7\conf\serverConf.xml' from 'C:\Program Files\Adobe\Adobe Campaign Classic v7\conf\eng\serverConf.xml.sample'
# 16:19:10 >   Creation of the server configuration file 'C:\Program Files\Adobe\Adobe Campaign Classic v7\conf\config-default.xml' from 'C:\Program Files\Adobe\Adobe Campaign Classic v7\conf\models\config-default.xml'
Sample output for nlserver start web:
# 16:19:50 >   Launching task 'web@default' ('nlserver web -tracefile:web@default -instance:default -detach -tomcat -autorepair') in a new process
# 16:19:50 >   Starting Web server module (pid=9984, tid=3520)...
# 16:19:51 >   Tomcat started
# 16:19:51 >   Server started
Sample output for nlserver config -internalpassword:
# Enter the current password.
# Password: <EMPTY>
# Enter the new password.
# Password: <internal>
The server is now installed and running! Read below to setup your first instance.
Setup an Instance
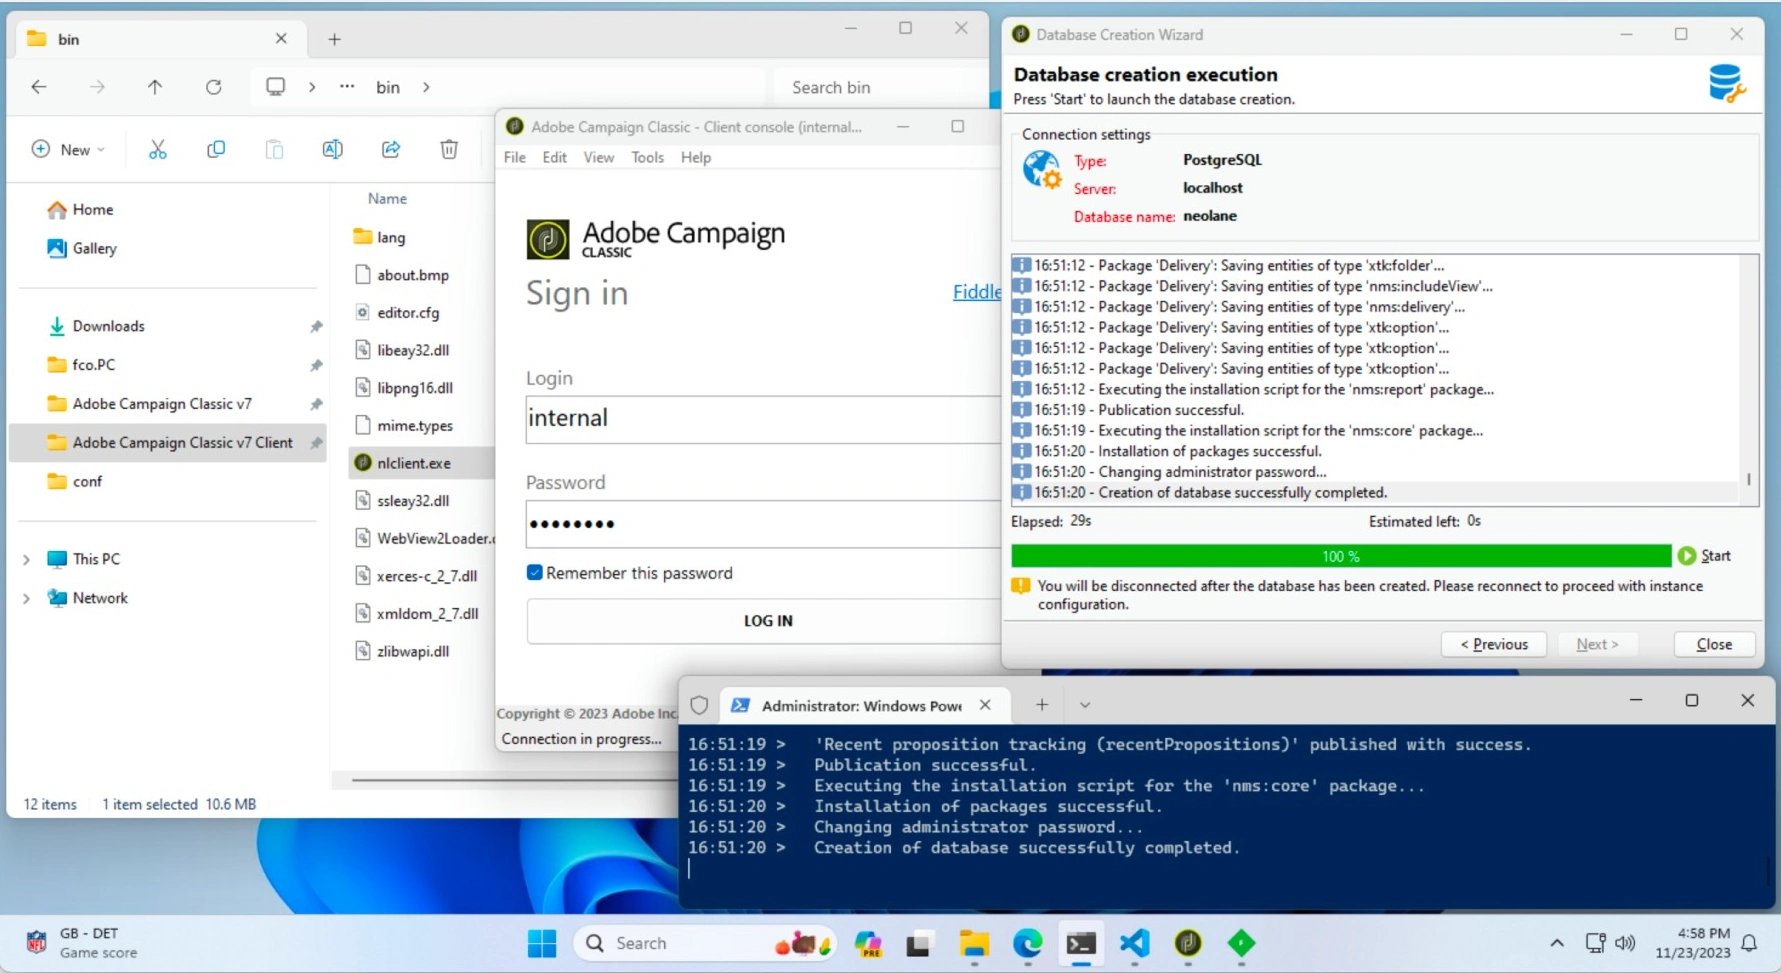
PS> nlserver config -verbose -addinstance:instance1/*/eng
16:28:23 >   Generating configuration diff file 'C:\Program Files\Adobe\Adobe Campaign Classic v7\conf\serverConf.xml.diff' between 'C:\Program Files\Adobe\Adobe Campaign Classic v7\conf\serverConf.xml' and 'C:\Program Files\Adobe\Adobe Campaign Classic v7\conf\eng\serverConf.xml.sample'.
16:28:24 >   PInstanceSlot not found for Vault token rotate: overwriting iRc to 0
16:28:24 >   Skiping call to vault for refreshing the token
16:28:24 >   Creation of the server configuration file 'C:\Program Files\Adobe\Adobe Campaign Classic v7\conf\config-instance1.xml' from 'C:\Program Files\Adobe\Adobe Campaign Classic v7\conf\models\config-multi.xml'
Start the console from C:\Users\fco.PC\Neolane\Adobe Campaign Classic v7 Client\bin\nlclient.exe.
Proceed to the Database creation with:
- Database Creation
- Database:
PostgreSQL - Host:
localhost
- Database:
- Server access
- Account:
postgres - Password
- Account:
- Database
- Database name:
neolane Create a new user account for this database- Account:
neolane - Password:
neolane
- Database name:
- Packages to install
- Delivery
- Creation steps
- Adobe Campaign administrator password: Set or change the password
- Password:
admin
Validation & Troubleshooting
Start workflows
PS> nlserver start wfserver@instance1
01:06:04 >   Application server for Adobe Campaign Classic (7.X.X build YYYY@aaa1111 of 01/01/2026)
01:06:05 >   Launching task 'wfserver@instance1' ('nlserver wfserver -tracefile:wfserver@instance1 -instance:instance1 -detach') in a new process
01:06:05 >   Starting workflow server (pid=12628, tid=7700)...
01:06:05 >   Starting 1 connection(s) on pool 'default instance1' (PostgreSQL, server='localhost', login='neolane:neolane')
Connect as admin
Login to the default http://localhost:8080 with admin/admin.
All set!
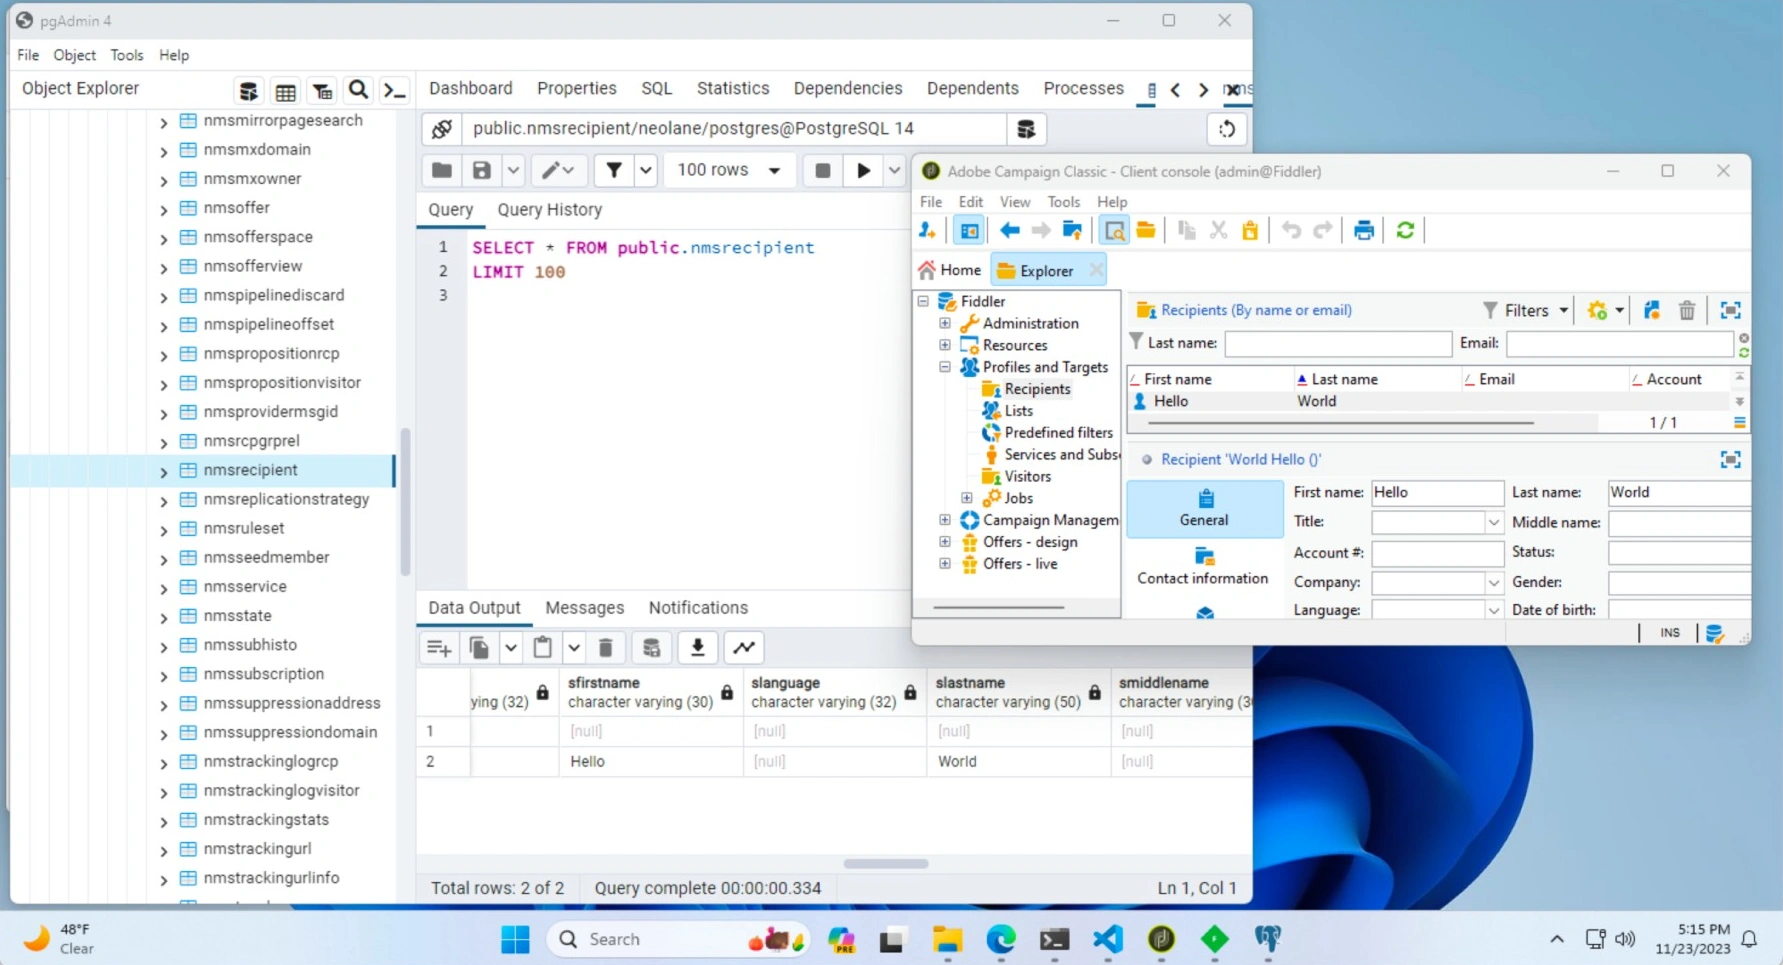
Create a recipient and check with pgAdmin: public.nmsrecipient/neolane/postgres@PostgreSQL 14
Note: if getting
XSV-350115 The user/password authentication is not authorized for 'admin' login via the '10.x.x.x' address. (iRc=-69), updateC:\Program Files\Adobe\Adobe Campaign Classic v7\conf\serverConf.xmlfromallowUserPassword="false"toallowUserPassword="true"
Going further
Run at startup
Want to start nlserver at startup? Run:
net start nlserver6
Call SOAP methods
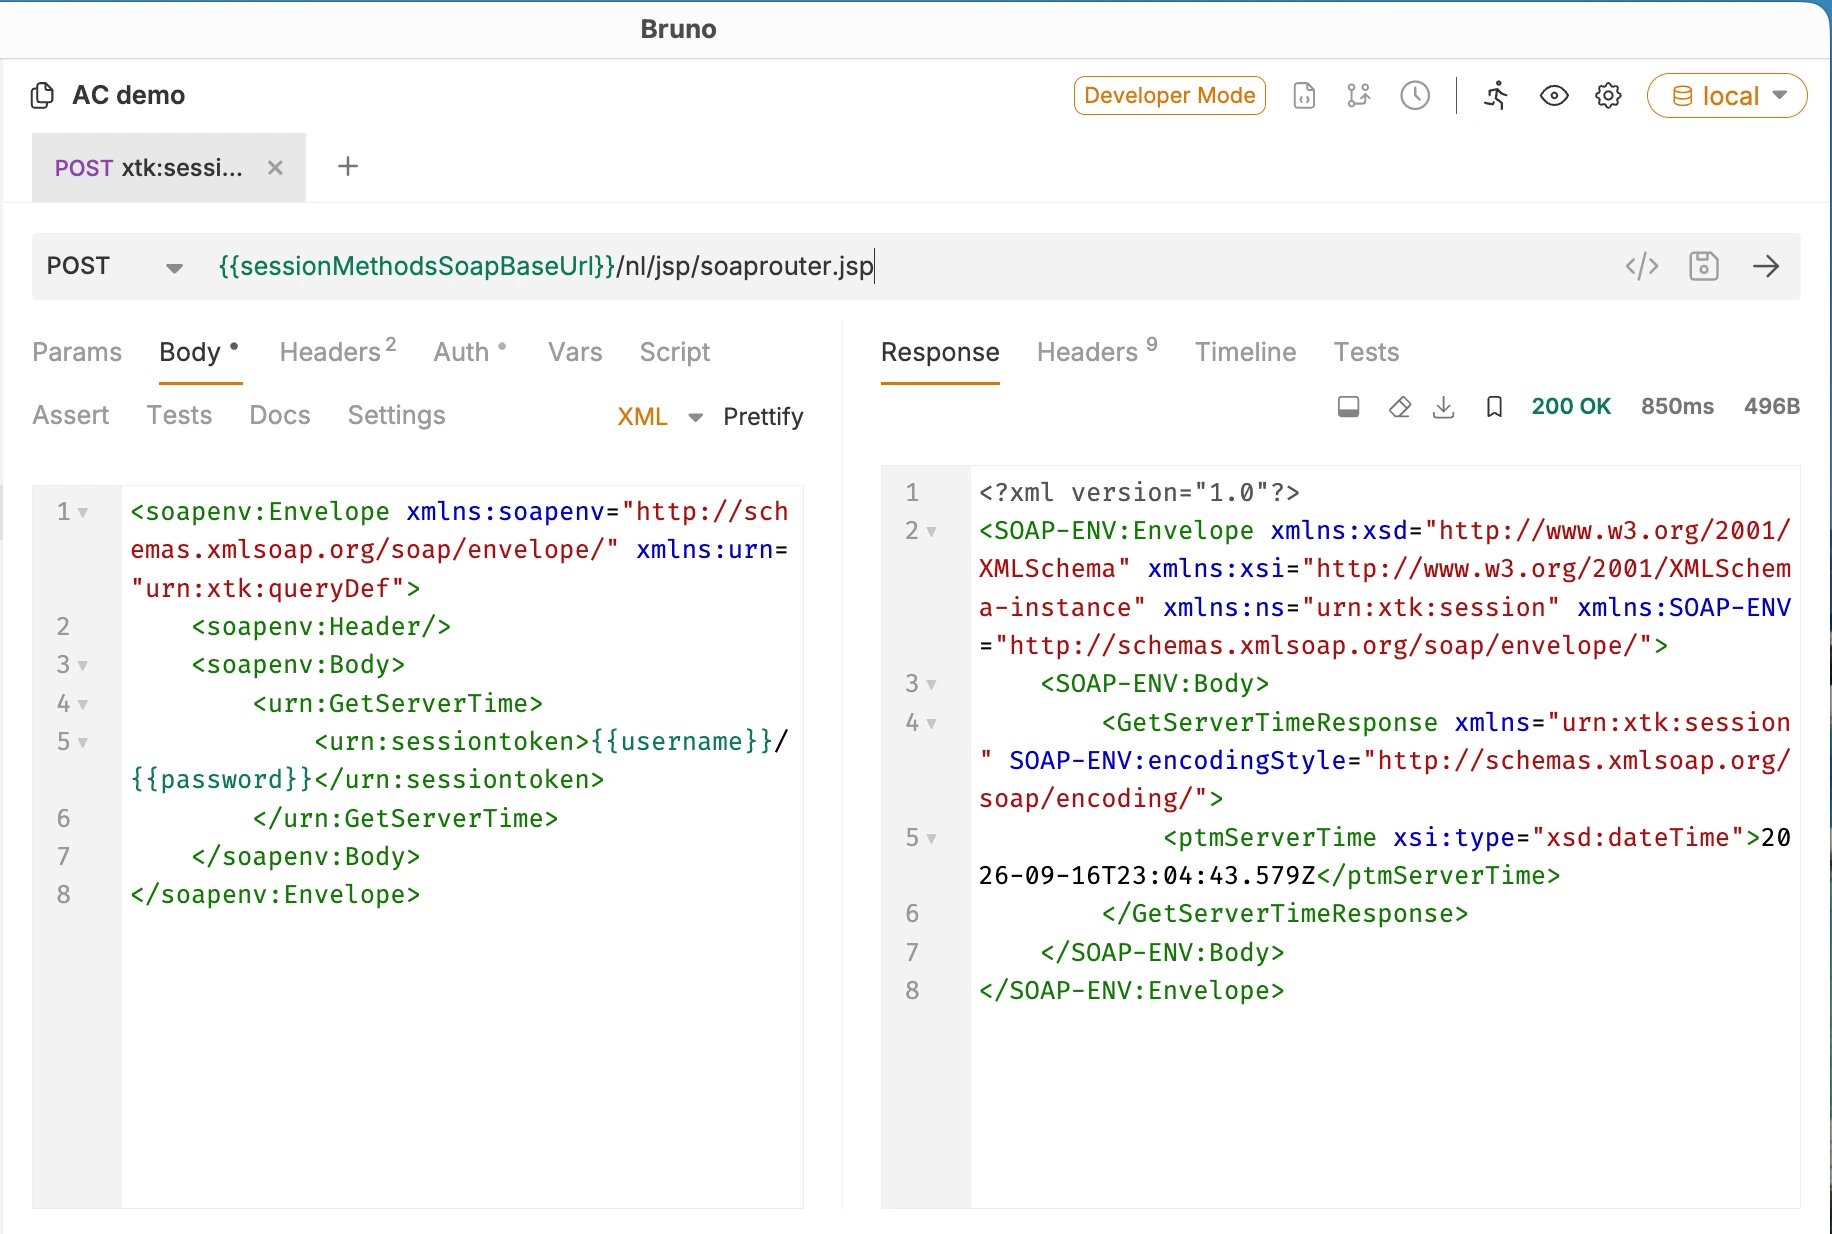
You may now call any SOAP methods, such as the read-only xtk:session#GetServerTime that returns the server time in UTC:
POST http://localhost:8080/nl/jsp/soaprouter.jsp

Headers
  Content-Type=application/xml
  SOAPAction=xtk:session#GetServerTime

<soapenv:Envelope xmlns:soapenv="http://schemas.xmlsoap.org/soap/envelope/" xmlns:urn="urn:xtk:queryDef">
    <soapenv:Header/>
    <soapenv:Body>
        <urn:GetServerTime>
            <urn:sessiontoken>admin/admin</urn:sessiontoken>
        </urn:GetServerTime>
    </soapenv:Body>
</soapenv:Envelope>
Run in a Windows VM
This guide is compatible both with a Windows PC and a Windows VM. This article features screenshots from a VMWare Windows 11 Virtual Machine (Windows11_22631.2715_Professional_en-us_arm64.iso) but any Windows version will do.
See also
- To pull schemas, JavaScript codes, and workflows as local source files, see Getting started with acc CLI.
- Prefer a Linux server install? Follow Adobe Campaign on a CentOS VirtualBox VM.