
Need to test workflows or develop custom JavaScript for Adobe Campaign without affecting production? Run it locally.
This guide shows 4 steps to install Adobe Campaign on Windows with both the Server and the Console, along with instructions for dependencies: Java JDK & PostgreSQL, for a complete local development environment. You can also follow the Video Tutorial:
Preparation
- Windows with Administrator rights (for Adobe Campaign server and its dependencies: Java JDK, PostgreSQL)
-
Java JDK 11 installed
- i.e. oracle.com: jdk-11.0.21_windows-x64_bin.exe (141 MB)
- To validate, run in a Terminal
javac -version
-
PostgreSQL 14 installed
- i.e. enterprisedb.com: postgresql-14.10-1-windows-x64.exe (347 MB)
- To validate, run in a Terminal
pg_config --version
-
Adobe Campaign server setup v7/v8 downloaded
- From adobe.com: 7.X.X - build YYYY - Windows - GENERAL AVAILABILITY, get your
7.X.YYYY.zip(91 MB)
- From adobe.com: 7.X.X - build YYYY - Windows - GENERAL AVAILABILITY, get your
Need a refresher on the Adobe Campaign architecture? Read the 📕 Architecture Reference
Walkthrough
The steps must be run in order: Install the Server, Run the Server, Set up an Instance, Connect the Database.
1. Install the Server
Step 1a: Unzip 7.X.YYYY.zip to a folder 7.X.YYYY, then launch 7.X.YYYY\setup.exe and complete the setup
Step 1b: Add the below folder to the user PATH via “Edit environment variables for your account”
-
C:\Program Files\Adobe\Adobe Campaign Classic v7\bin(later referred to as$(XTK_INSTALL_DIR))
The server is now installed!
Step 1c: Check the installation by running nlserver in a new Terminal:
nlserver
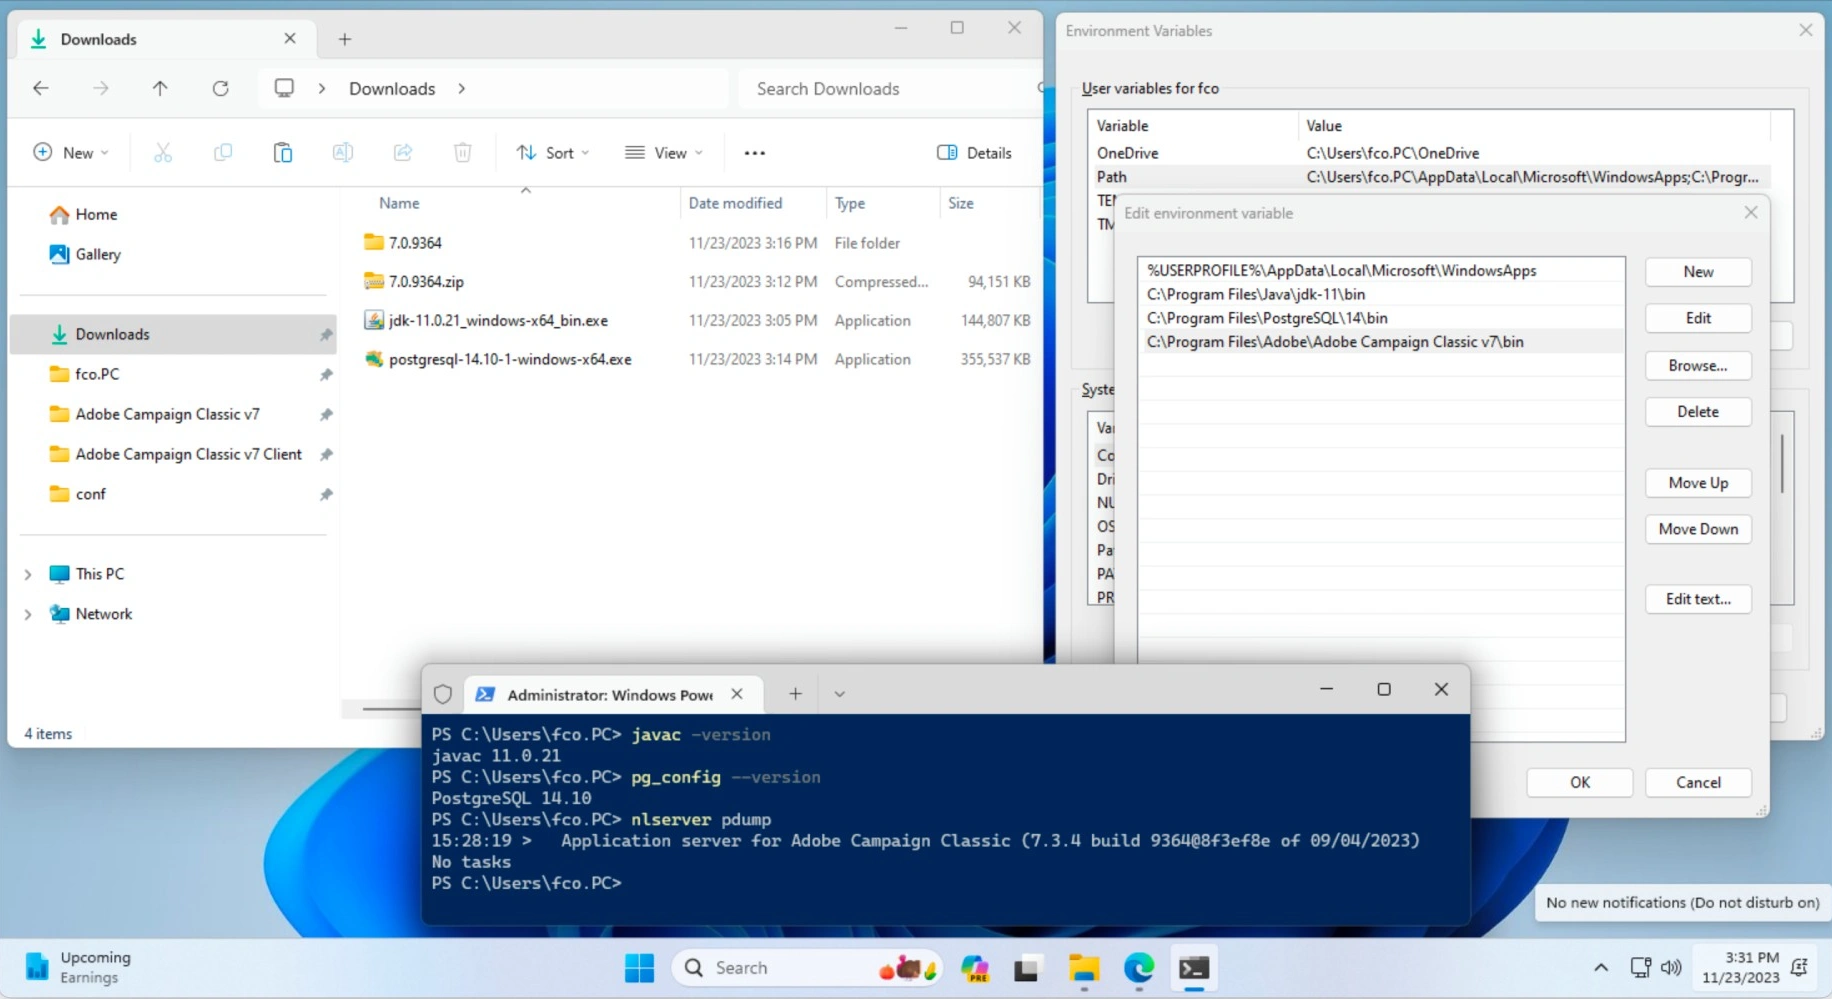
Sample output:
# Usage: nlserver <command> <arguments of command>.
#
#   Available commands are:
#
#     aliasCleansing cleanse enumeration values
#     archiving      [...]
Now that the server is installed, head to the next section to run it.
2. Run the Server
To run the server, open an Administrator Terminal (Right click on the Windows icon > Terminal (Admin)) and follow the 3 commands.
Step 2a: Initialize the default configuration files serverConf.xml & config-default.xml with:
nlserver web
Stop it with Ctrl+C, then open a new tab.
Step 2b: Start the Tomcat server on http://localhost:8080:
nlserver start web
Step 2c: change the default internal password. Note: when prompted for the current password, hit Enter as it’s empty.
nlserver config -internalpassword
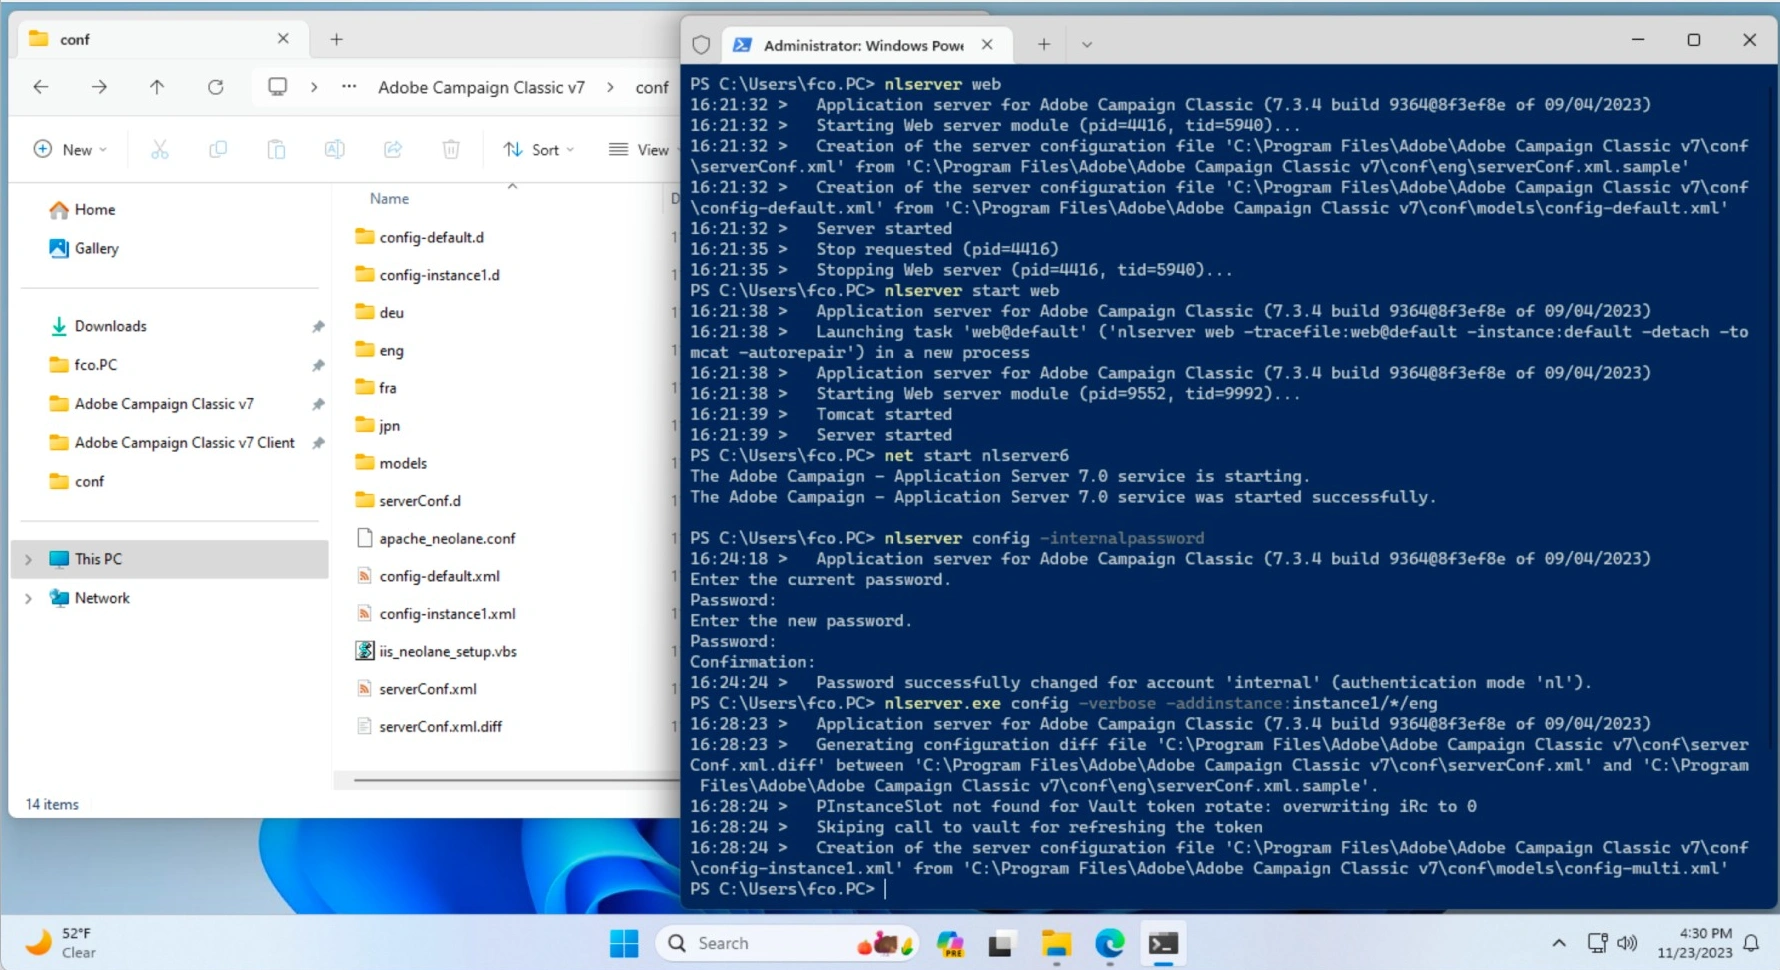
Sample output for nlserver web:
# 16:19:10 >   Application server for Adobe Campaign Classic (7.X.X build YYYY@aaa1111 of 01/01/2026)
# 16:19:10 >   Starting Web server module (pid=7636, tid=3156)...
# 16:19:10 >   Creation of the server configuration file 'C:\Program Files\Adobe\Adobe Campaign Classic v7\conf\serverConf.xml' from 'C:\Program Files\Adobe\Adobe Campaign Classic v7\conf\eng\serverConf.xml.sample'
# 16:19:10 >   Creation of the server configuration file 'C:\Program Files\Adobe\Adobe Campaign Classic v7\conf\config-default.xml' from 'C:\Program Files\Adobe\Adobe Campaign Classic v7\conf\models\config-default.xml'
Sample output for nlserver start web:
# 16:19:50 >   Launching task 'web@default' ('nlserver web -tracefile:web@default -instance:default -detach -tomcat -autorepair') in a new process
# 16:19:50 >   Starting Web server module (pid=9984, tid=3520)...
# 16:19:51 >   Tomcat started
# 16:19:51 >   Server started
Sample output for nlserver config -internalpassword:
# Enter the current password.
# Password: <EMPTY>
# Enter the new password.
# Password: <internal>
The server is now installed and running! Read below to set up your first instance.
3. Set up the Instance
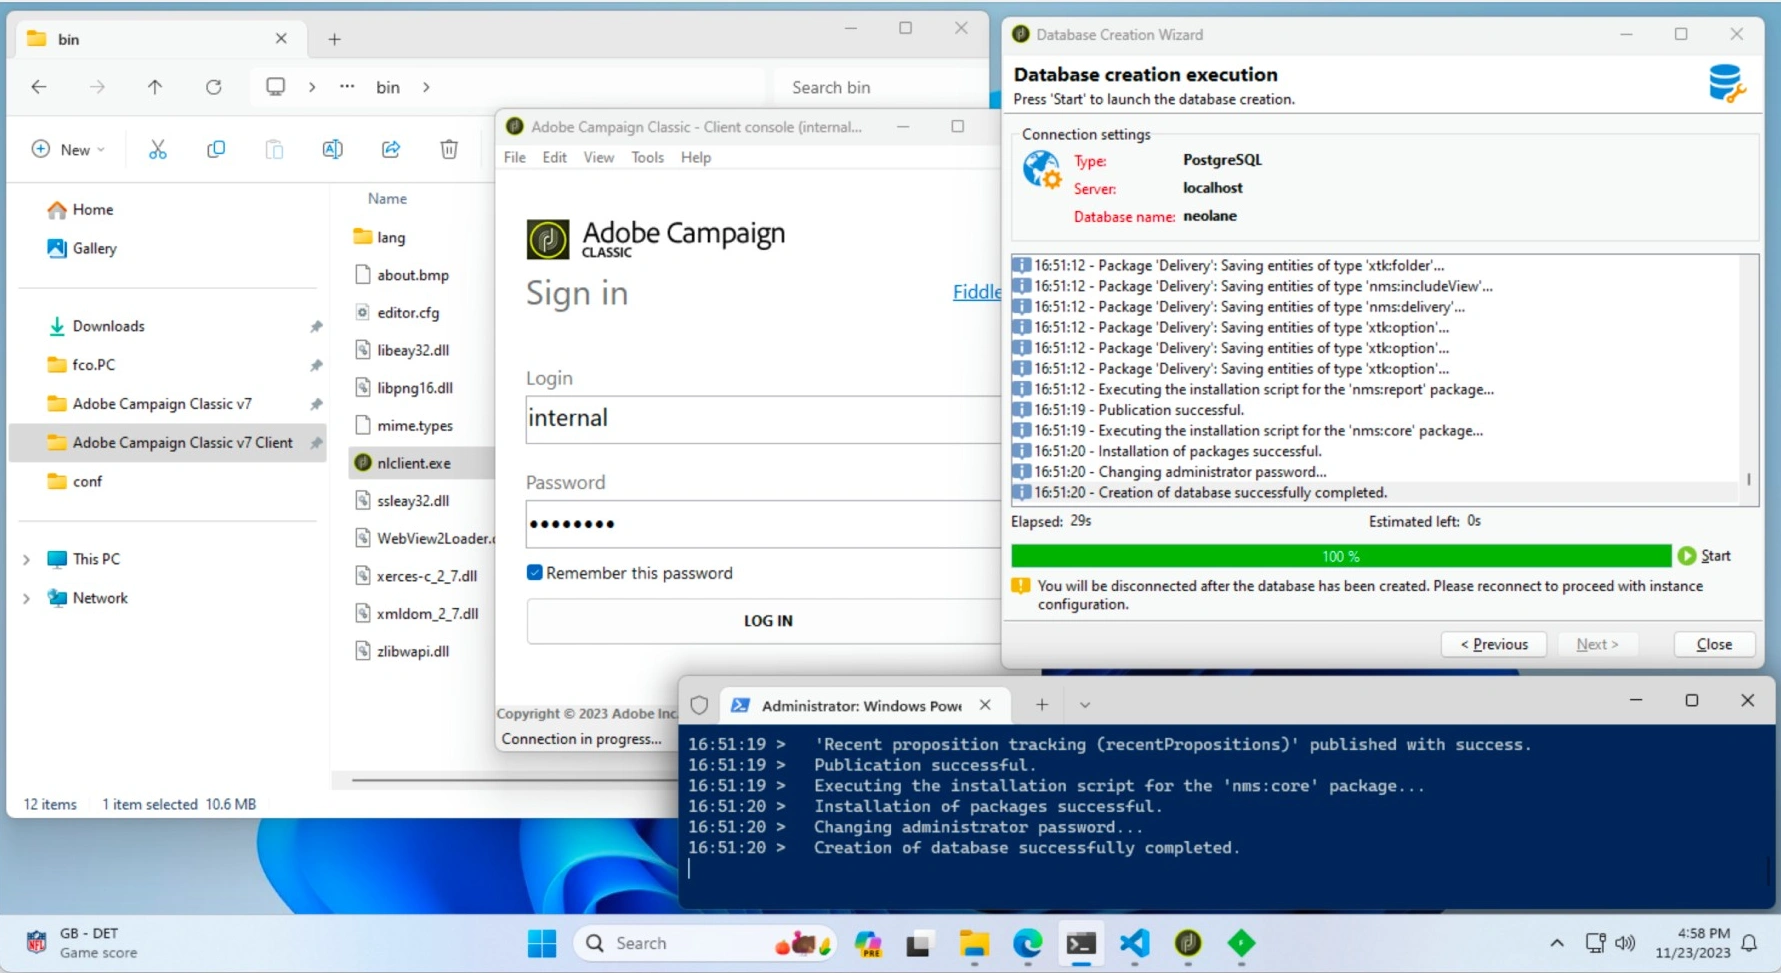
Step 3: Create the default instance configuration in English, with the alias “instance1”:
nlserver config -verbose -addinstance:instance1/*/eng
Sample output:
# 16:28:23 >   Generating configuration diff file 'C:\Program Files\Adobe\Adobe Campaign Classic v7\conf\serverConf.xml.diff' between 'C:\Program Files\Adobe\Adobe Campaign Classic v7\conf\serverConf.xml' and 'C:\Program Files\Adobe\Adobe Campaign Classic v7\conf\eng\serverConf.xml.sample'.
# 16:28:24 >   PInstanceSlot not found for Vault token rotate: overwriting iRc to 0
# 16:28:24 >   Skiping call to vault for refreshing the token
# 16:28:24 >   Creation of the server configuration file 'C:\Program Files\Adobe\Adobe Campaign Classic v7\conf\config-instance1.xml' from 'C:\Program Files\Adobe\Adobe Campaign Classic v7\conf\models\config-multi.xml'
4. Connect the Database
Step 4a: Start the console from $(XTK_INSTALL_DIR)\bin\nlclient.exe and login with the below information:
- Connection URL:
http://localhost:8080(already set as default Connection “Adobe Inc. v6”) - Login:
internal - Password: [From Step 2c]
The wizard will proceed to the Database creation.
Step 4b: Database creation
- Database:
PostgreSQL - Host:
localhost
Step 4c: Server access
- Account:
postgres - Password: [Defined during the Prerequisites PostgreSQL]
Step 4d: Creation steps
- Adobe Campaign administrator password: Set or change the password
- Password: [Your choice]
Step 4e: Database creation execution
The wizard automatically creates all SQL tables & indexes.
This is it! Adobe Campaign is installed and fully configured.
Validation & Troubleshooting
Connect as admin
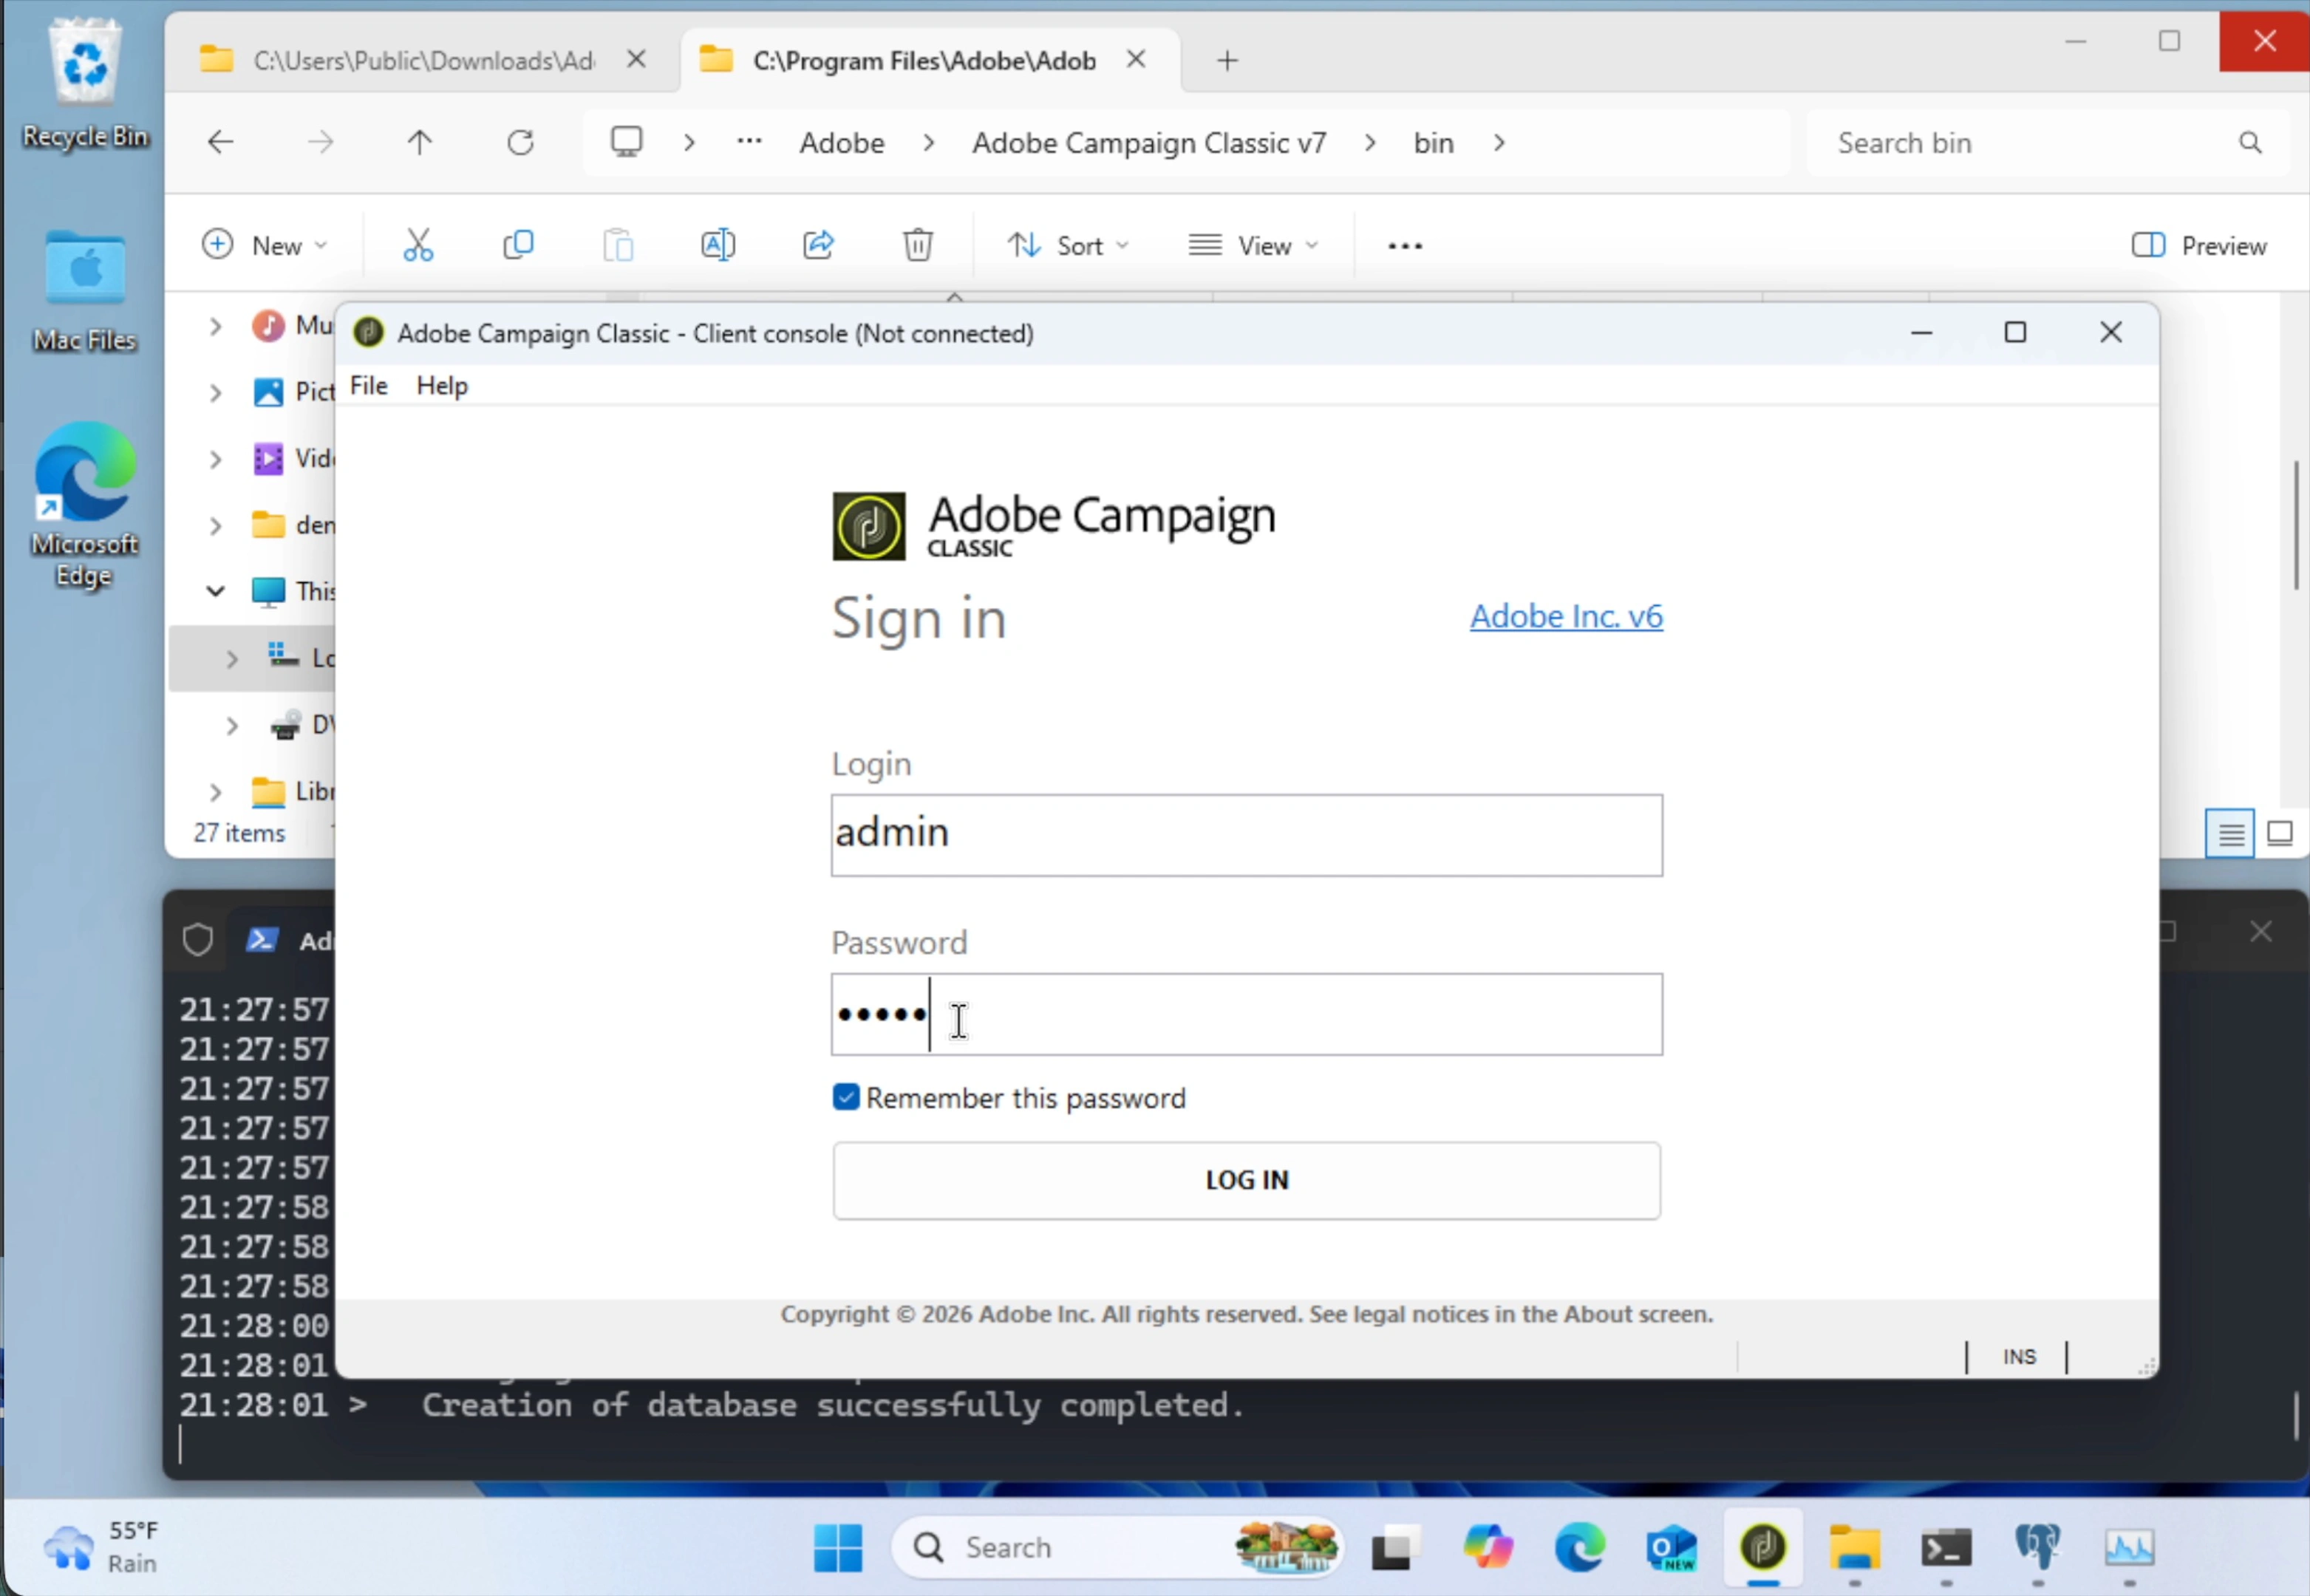
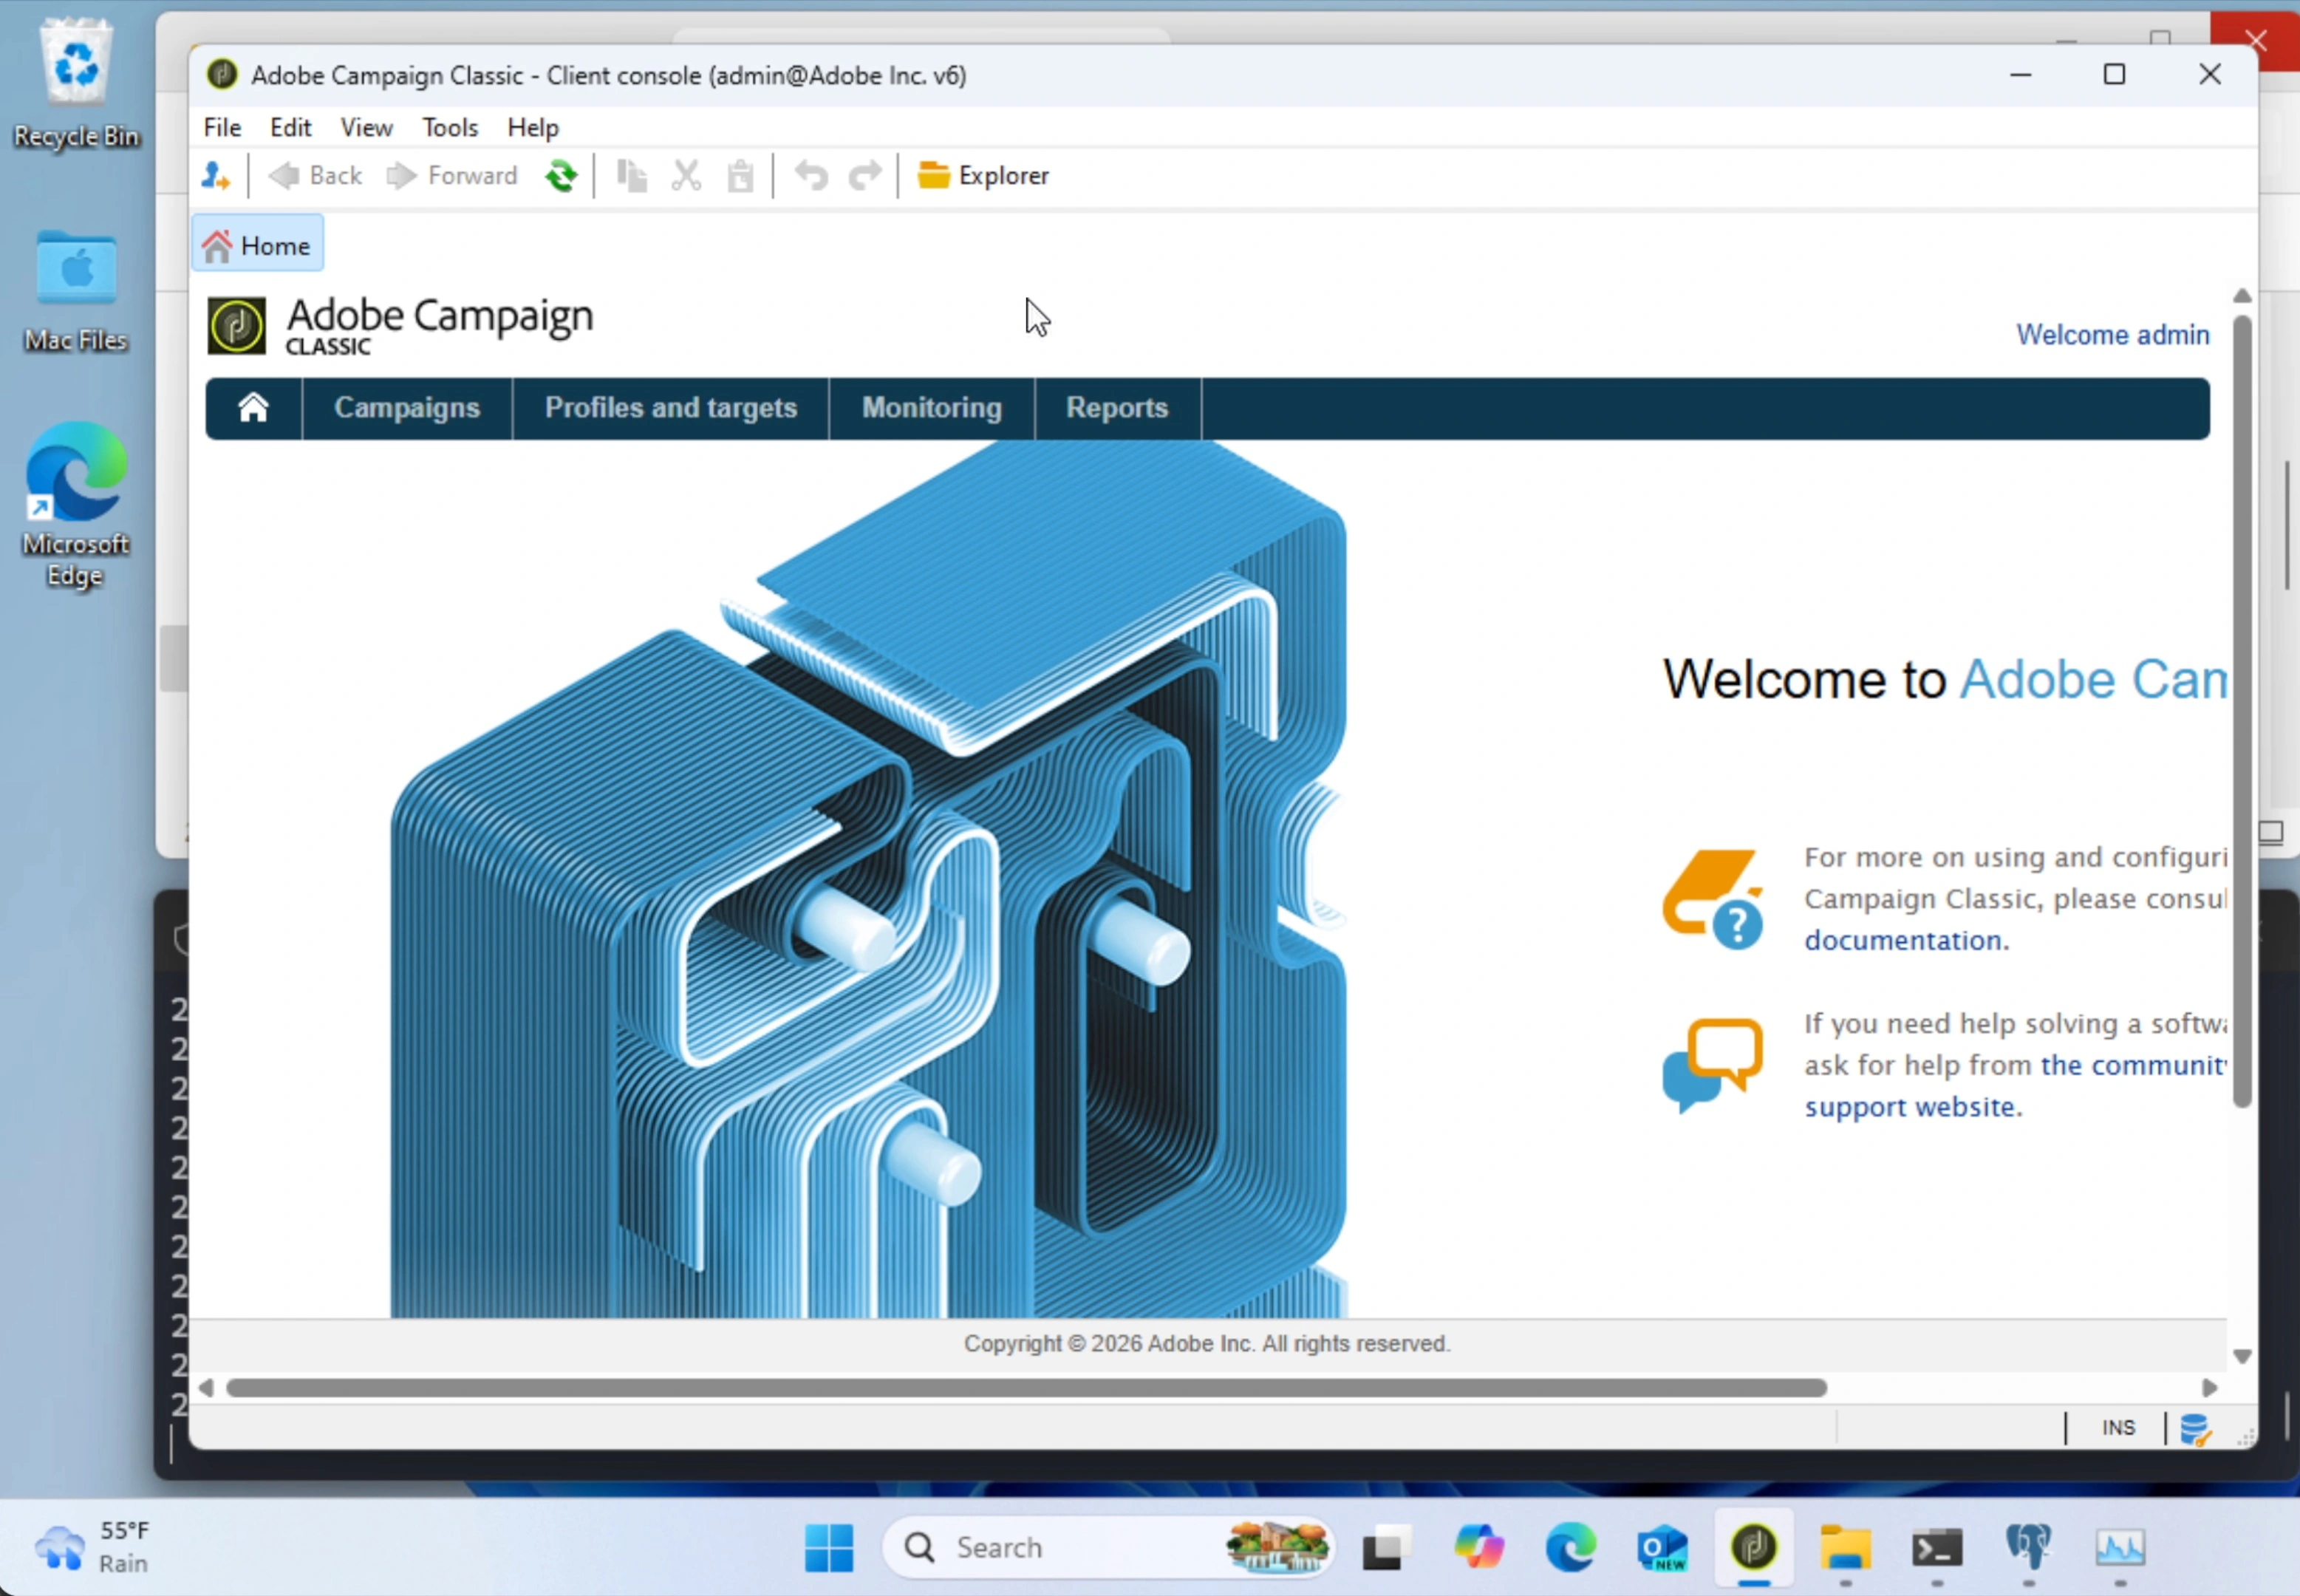
Login to the default http://localhost:8080 with the username admin and the password from the Step 4d.
All set!
Note: if getting
XSV-350115 The user/password authentication is not authorized for 'admin' login via the '10.x.x.x' address. (iRc=-69), update$(XTK_INSTALL_DIR)\conf\serverConf.xmlfromallowUserPassword="false"toallowUserPassword="true"
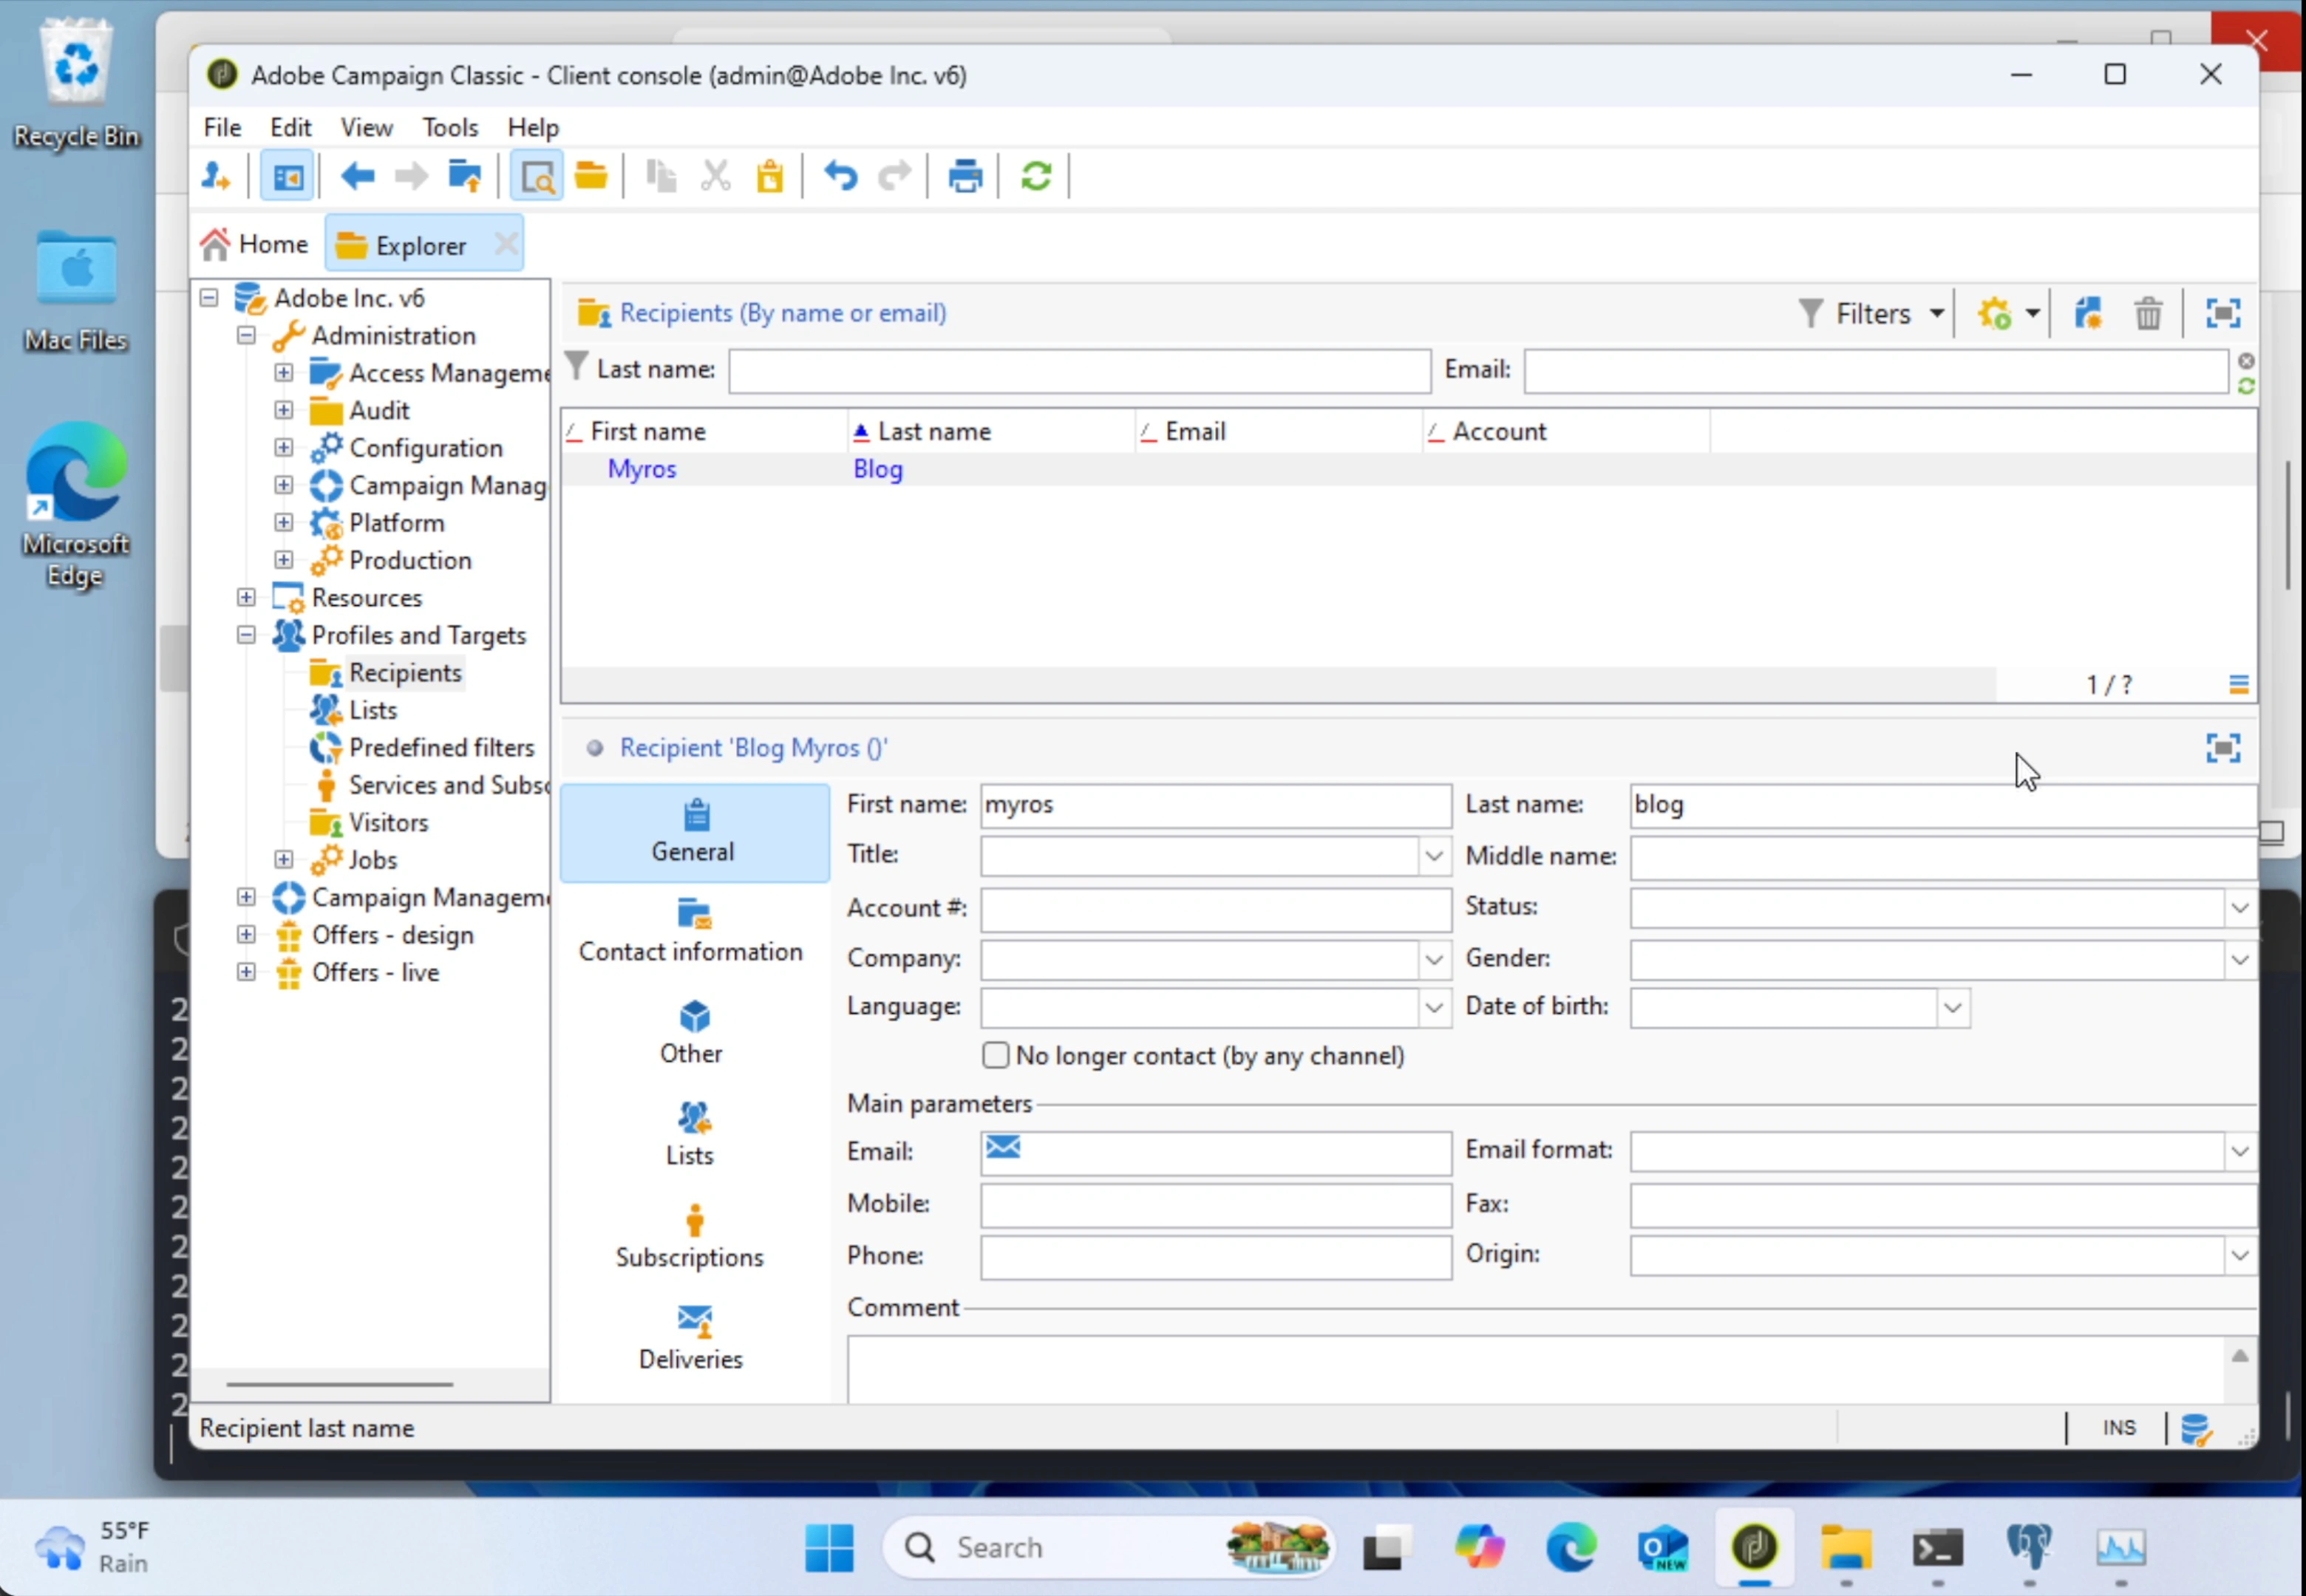
Create a recipient
Any feature is now available, such as creating a recipient in Profiles and Targets:
Check if the server is up
Run nlserver pdump to list all modules started with start.
Going further
Start workflows
nlserver start wfserver@instance1
Sample output:
# 01:06:04 >   Application server for Adobe Campaign Classic (7.X.X build YYYY@aaa1111 of 01/01/2026)
# 01:06:05 >   Launching task 'wfserver@instance1' ('nlserver wfserver -tracefile:wfserver@instance1 -instance:instance1 -detach') in a new process
# 01:06:05 >   Starting workflow server (pid=12628, tid=7700)...
# 01:06:05 >   Starting 1 connection(s) on pool 'default instance1' (PostgreSQL, server='localhost', login='neolane:neolane')
Run at startup
Want to start nlserver at startup? Run:
net start nlserver6
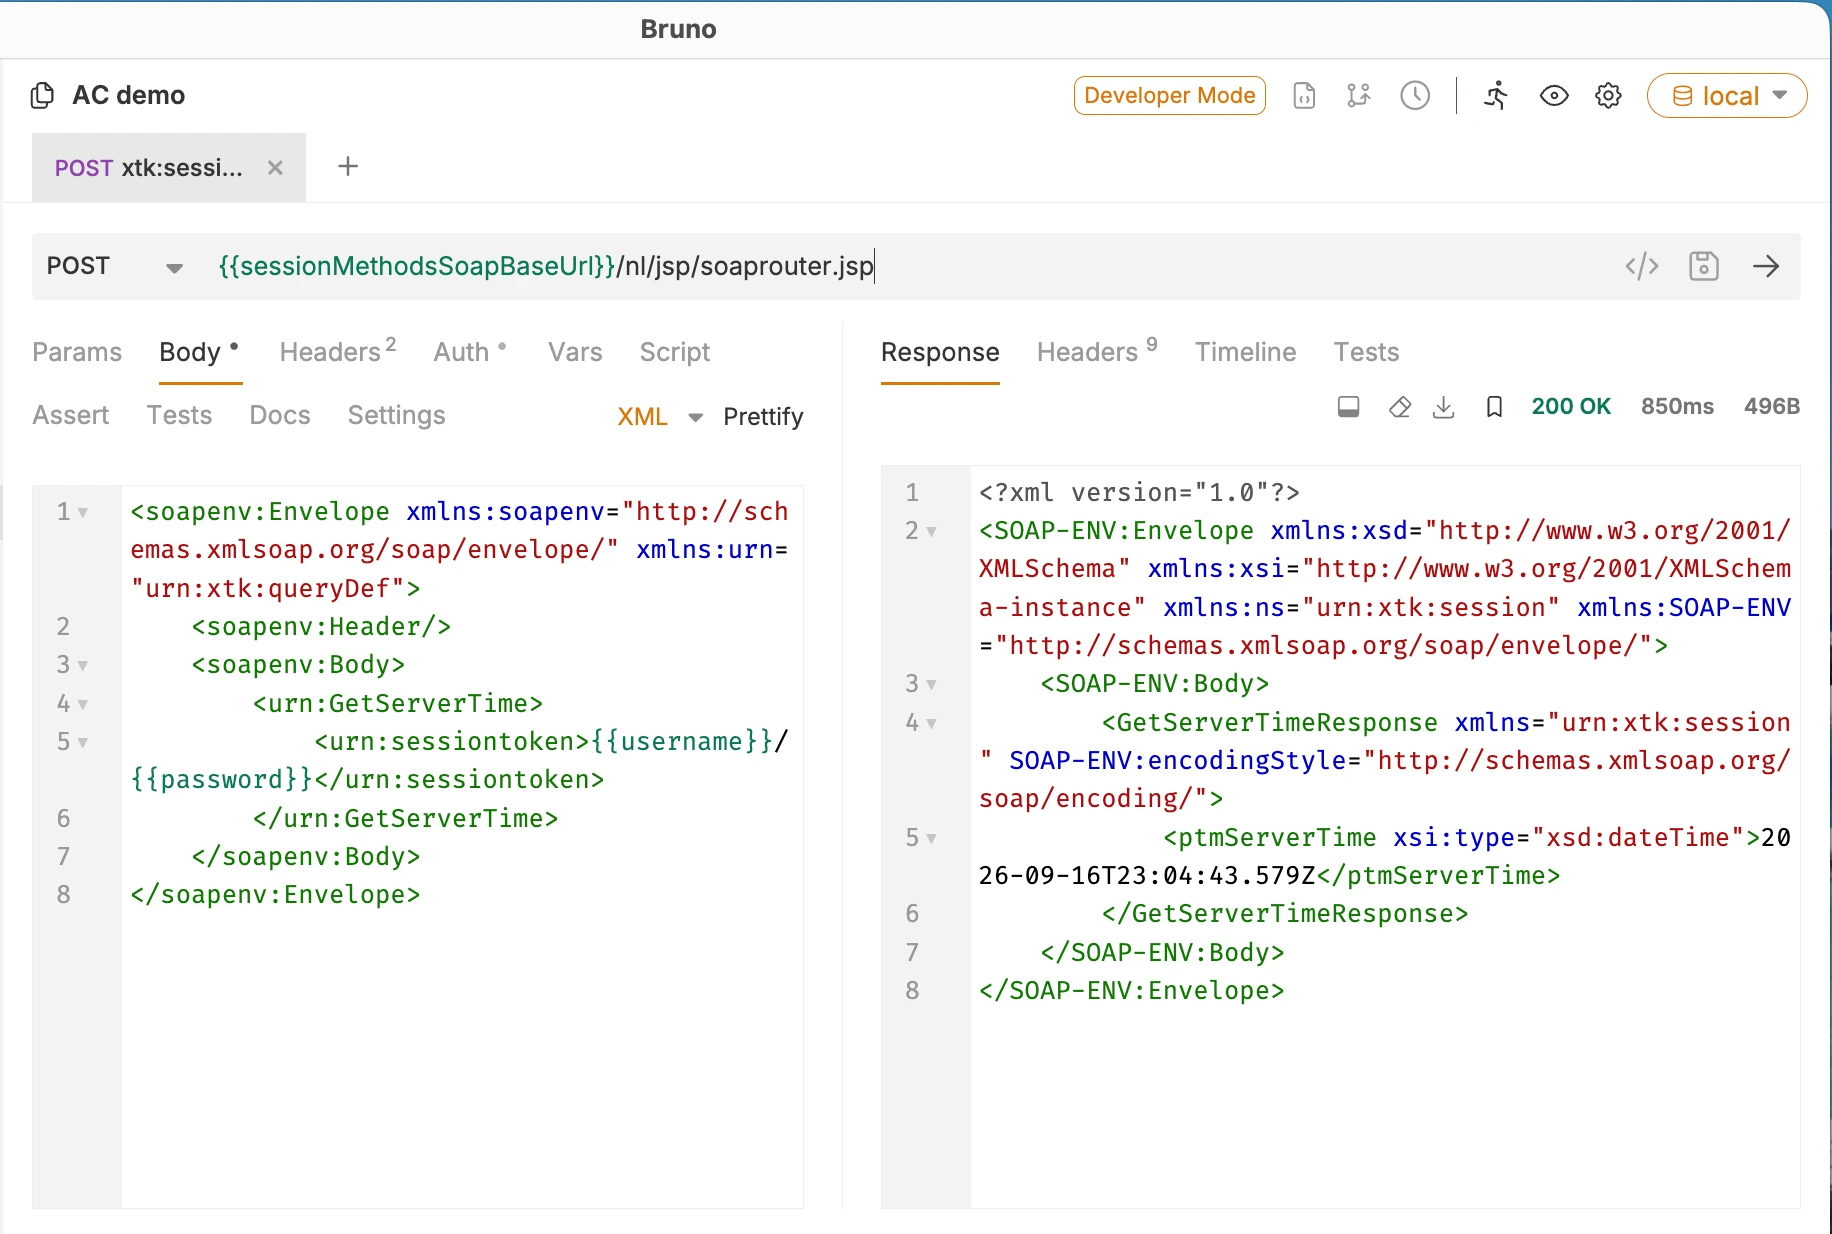
Call SOAP methods
You may now call any SOAP methods, such as the read-only GetServerTime that returns the server time in UTC:
POST http://localhost:8080/nl/jsp/soaprouter.jsp

Headers
  Content-Type=application/xml
  SOAPAction=xtk:session#GetServerTime
<soapenv:Envelope xmlns:soapenv="http://schemas.xmlsoap.org/soap/envelope/" xmlns:urn="urn:xtk:queryDef">
    <soapenv:Header/>
    <soapenv:Body>
        <urn:GetServerTime>
            <urn:sessiontoken>admin/[Password from Step 4d]</urn:sessiontoken>
        </urn:GetServerTime>
    </soapenv:Body>
</soapenv:Envelope>
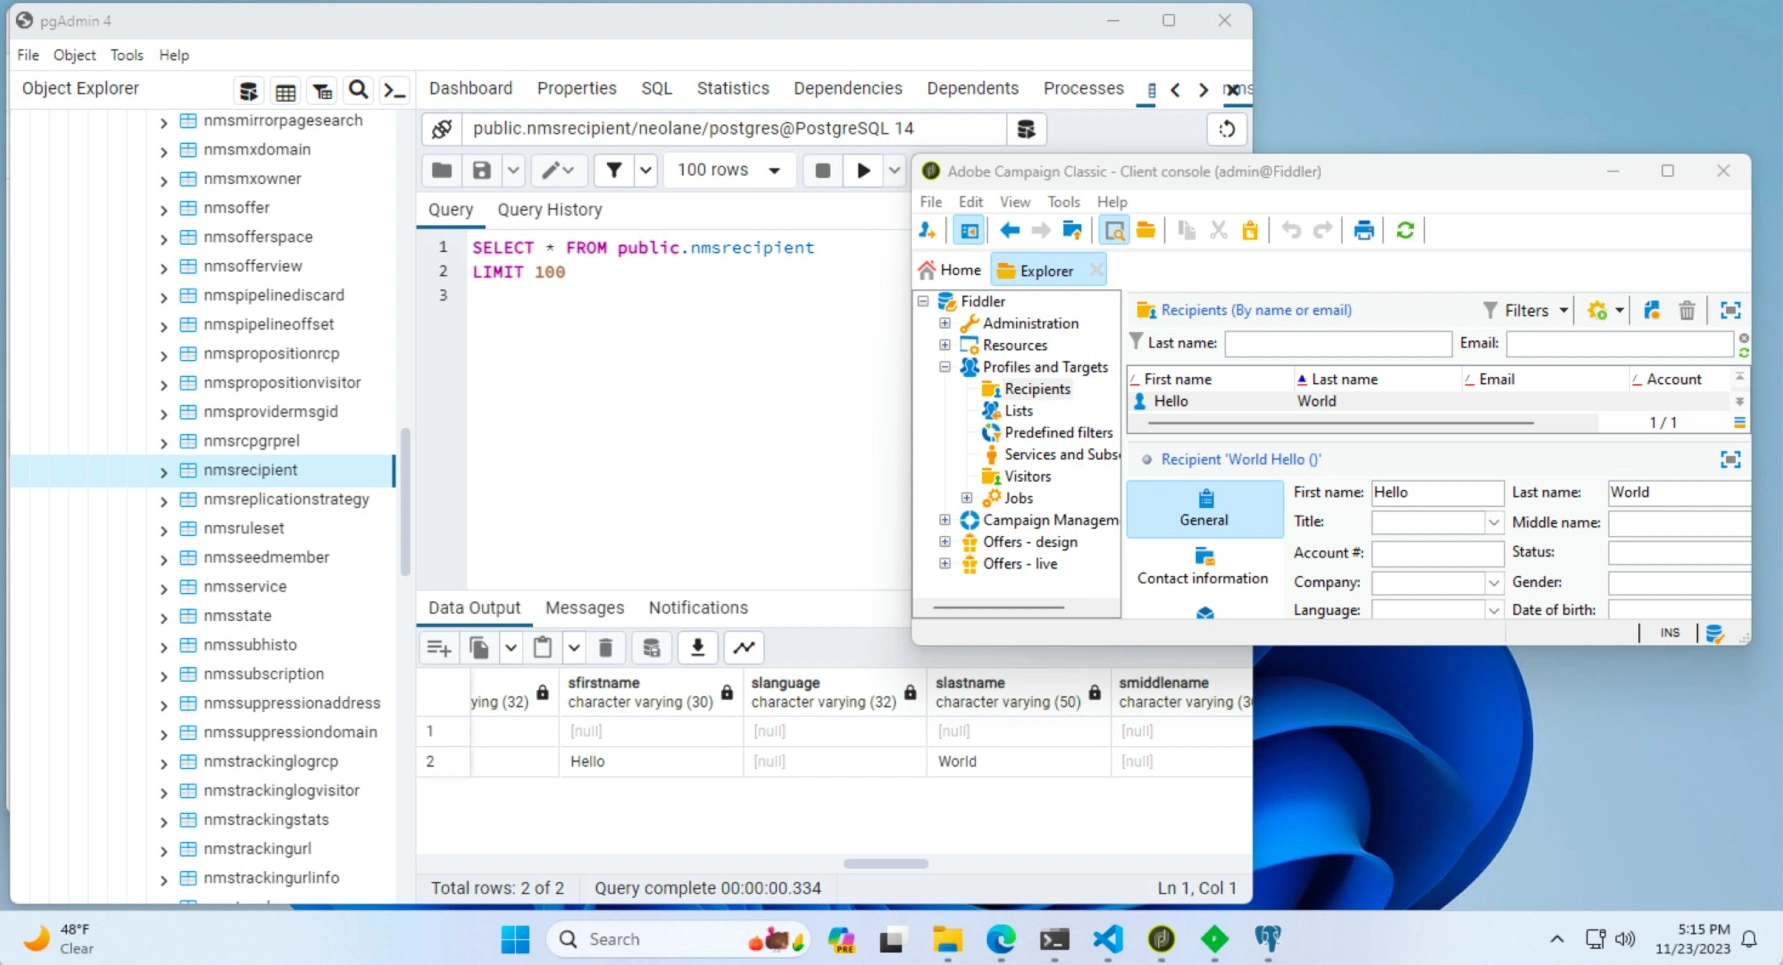
Check SQL records
Check any table, such as the Recipients, in pgAdmin: public.nmsrecipient/neolane/postgres@PostgreSQL 14
Run in a Windows VM
This guide is compatible both with a Windows PC and a Windows VM. This article features screenshots from a VMmare Windows 11 Virtual Machine (Windows11_22631.2715_Professional_en-us_arm64.iso) but any Windows version will do.
See also
- To pull schemas, JavaScript codes, and workflows as local source files, see Getting started with acc CLI.
- Prefer a Linux server install? Follow Adobe Campaign on a CentOS VirtualBox VM.